How to create your own design templates (SAAS plan)
Custom templates are used to prepare your own content layout from individual widgets and repeatedly use it for products, categories, or blog posts.
This feature is only available with the SAAS plan.
How to create custom design templates
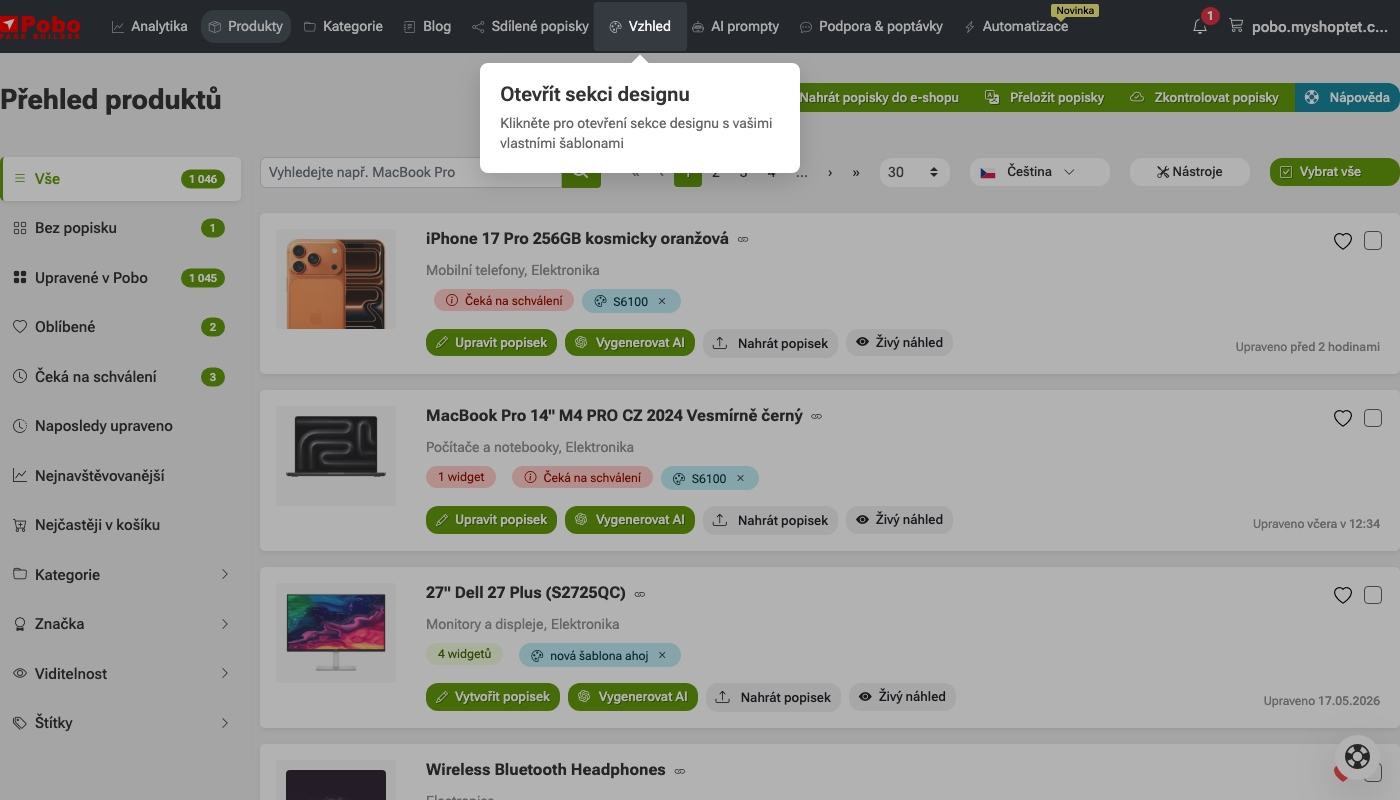
1. Open the Appearance section
Click on the Appearance item in the top menu.
This will open the design section, where you can work with custom templates, individual appearance adjustments, and other settings for the appearance of content on the e-shop.
2. Go to the Custom Templates section
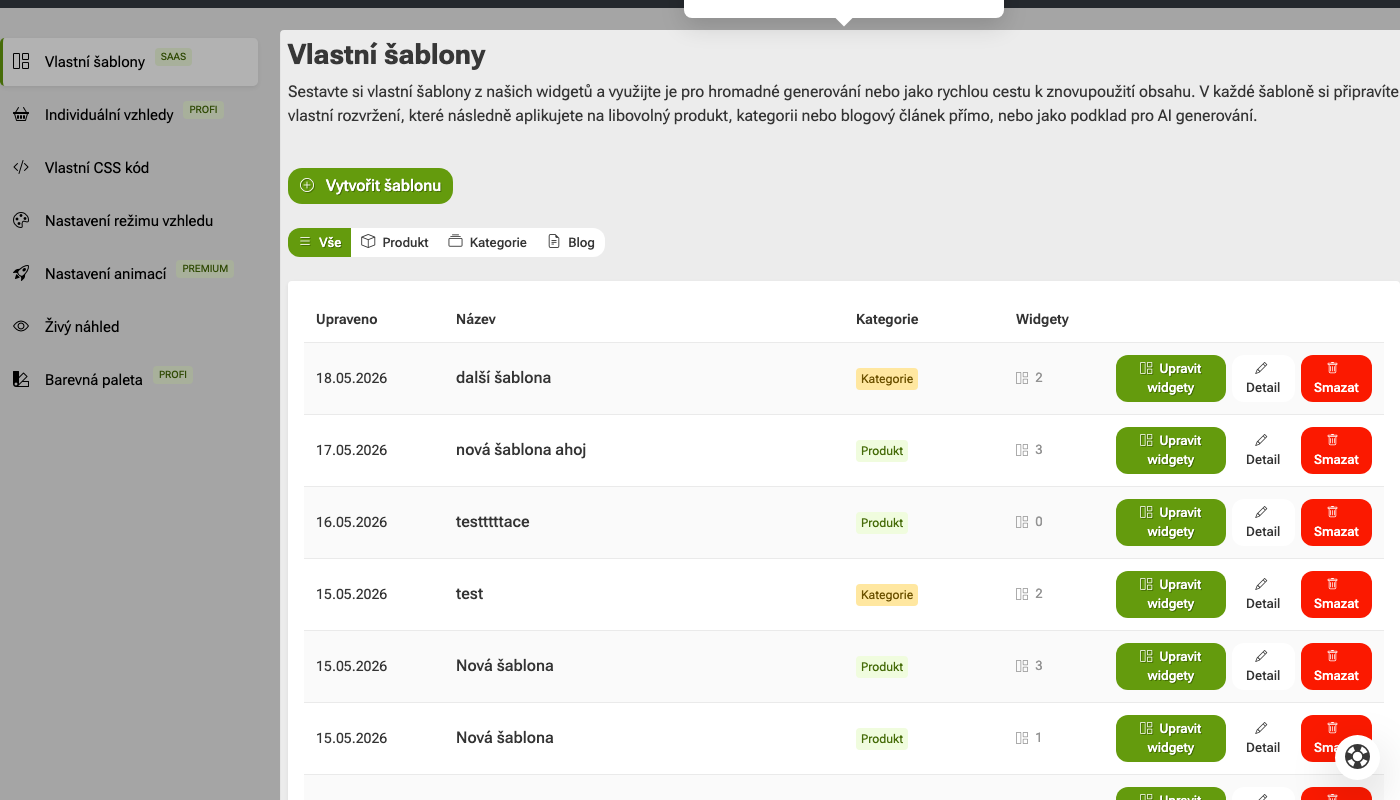
Click on the Custom Templates item in the left menu.
On this page, you will find an overview of all created templates and you can create a new template for a product, category, or blog here.
3. Filter by template type
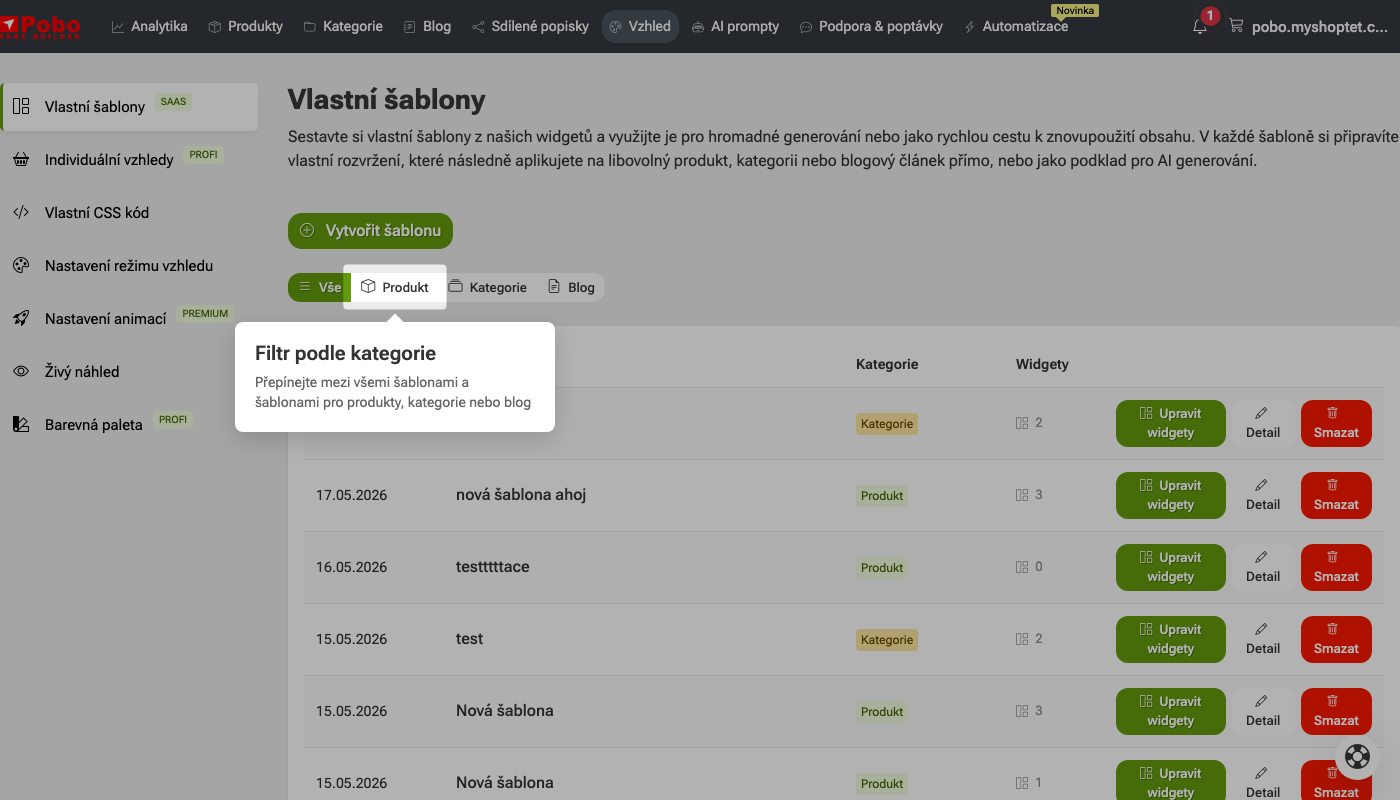
Using the filter, you can display only templates for a specific content type.
Select whether you want to see templates for products, categories, or blogs. If you want to display all templates, leave the option All.
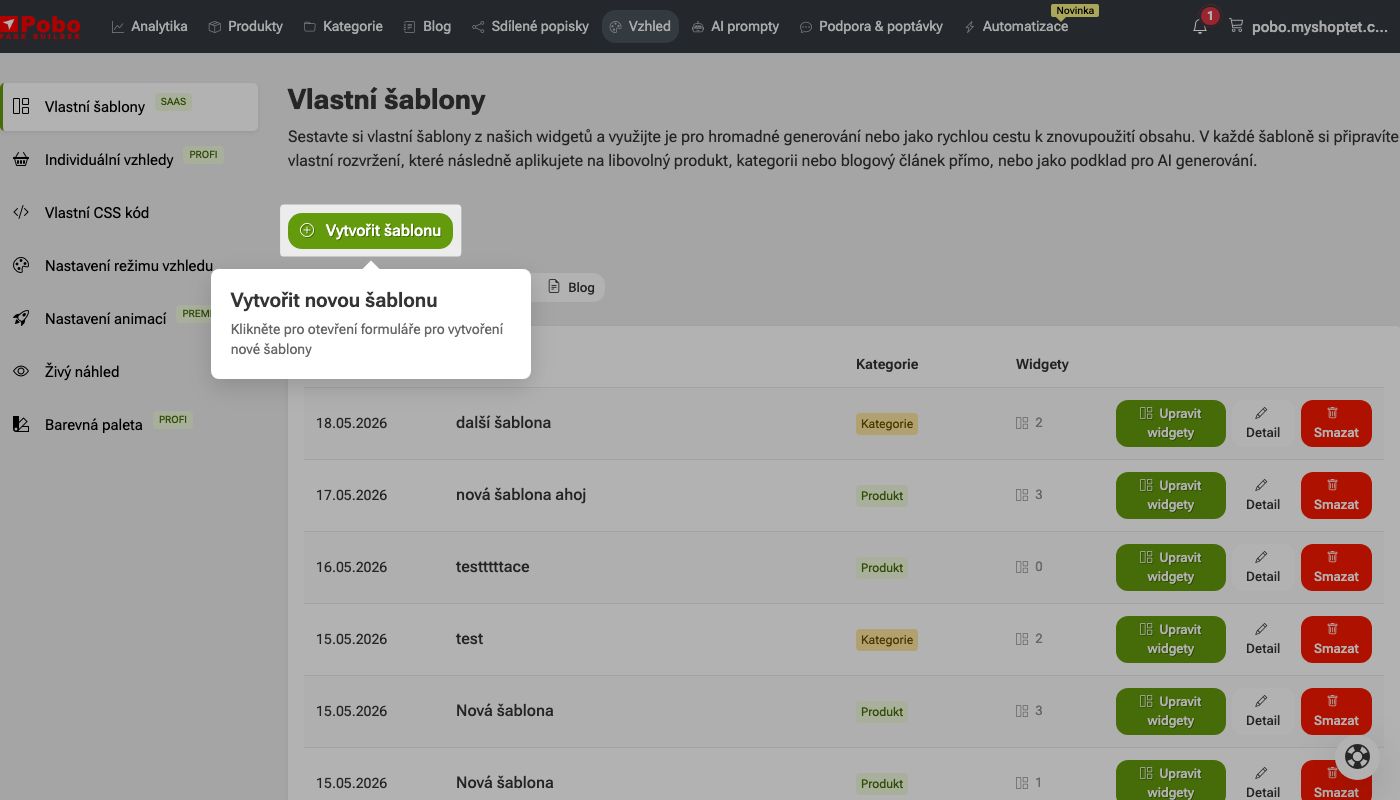
4. Click on Create Template
To create a new custom template, click on the Create Template button. A form will open where you will name the template and set for which type of content it will be used.
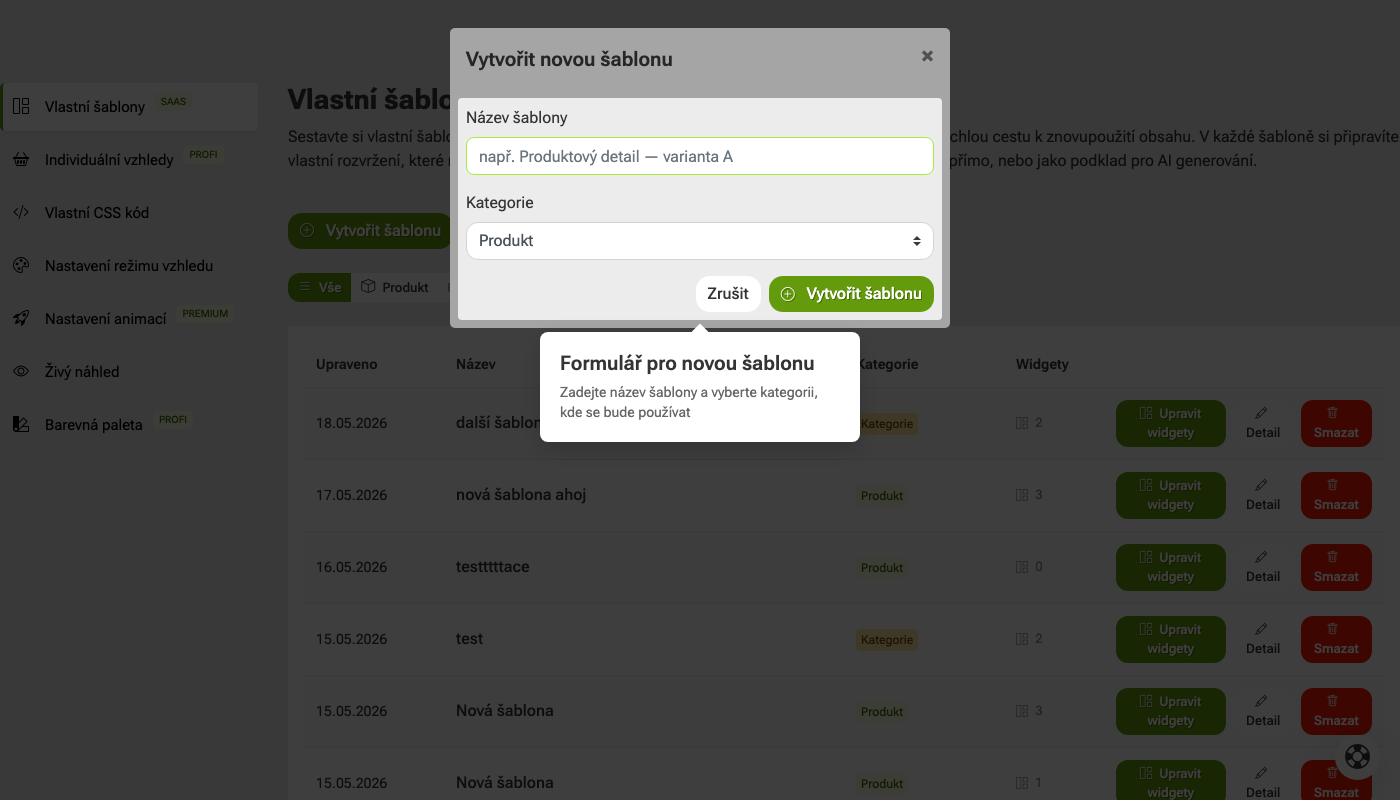
5. Fill out the form for the new template
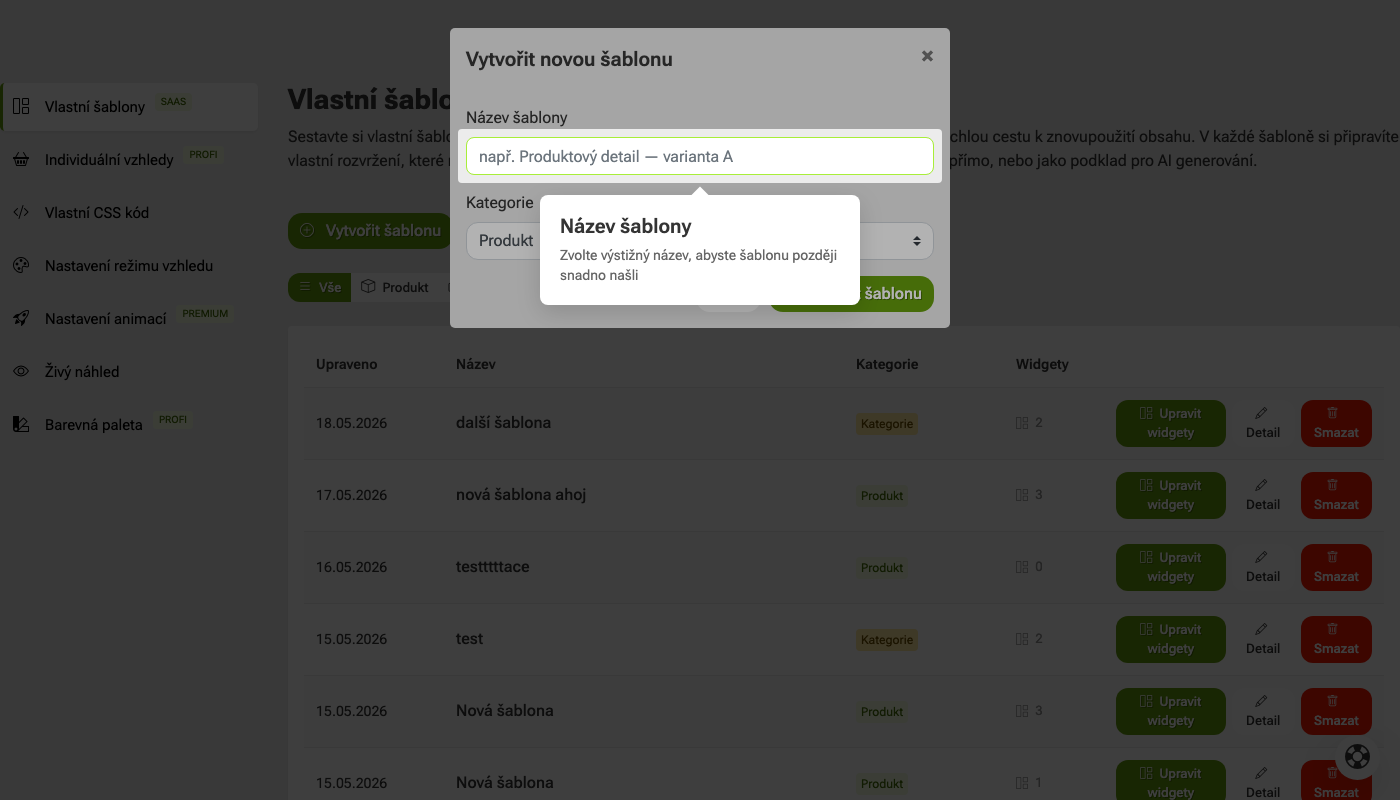
Enter the name in the Template Name field so you can easily recognize the template later. Then select the category, whether the template will be used for a product, category, or blog.
6. Enter the template name
Write a descriptive name in the Template Name field so you can easily recognize the template later. The name may refer to, for example, the type of page, the purpose of the template, or a specific design variant.
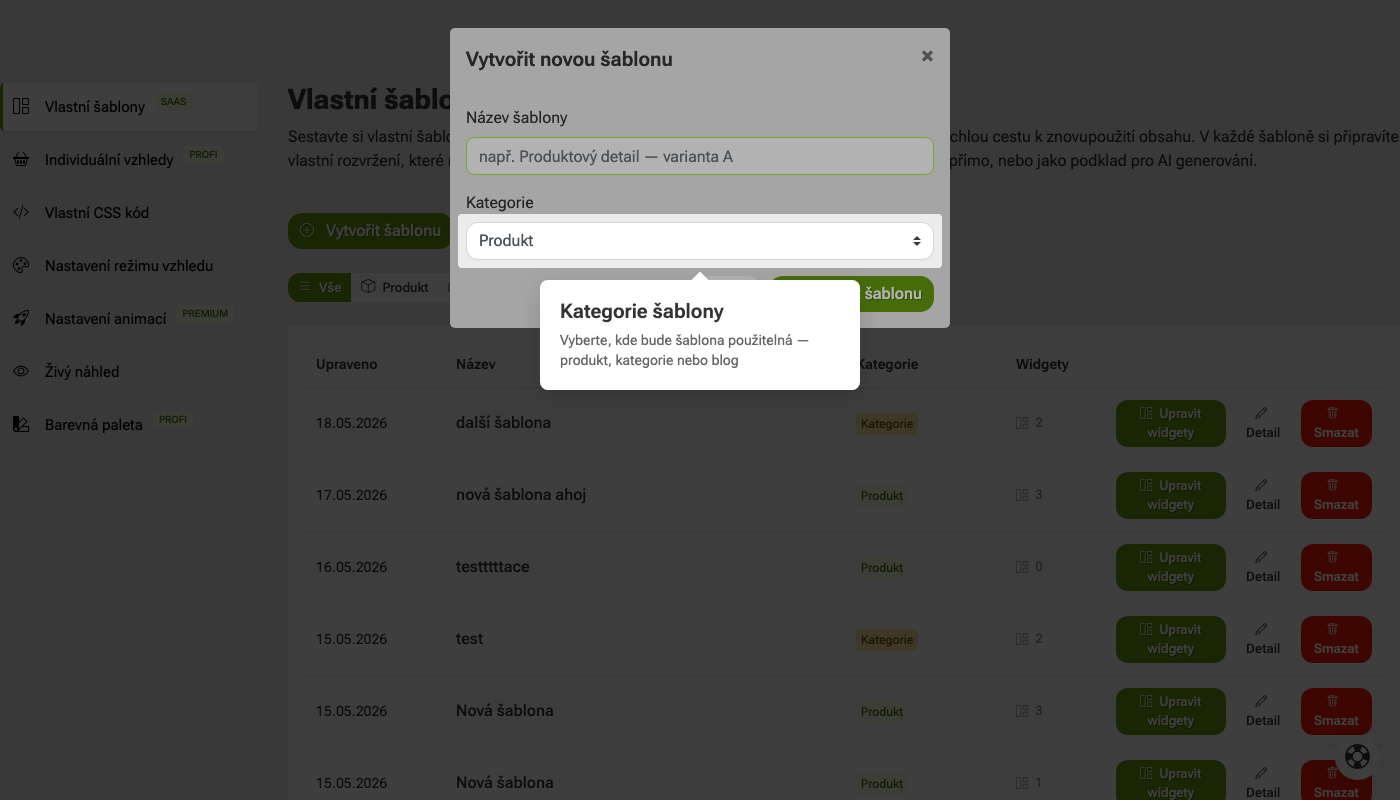
7. Select template category
In the Category field, select where the template will be used. You can choose, for example, a template for product, category, or blog.
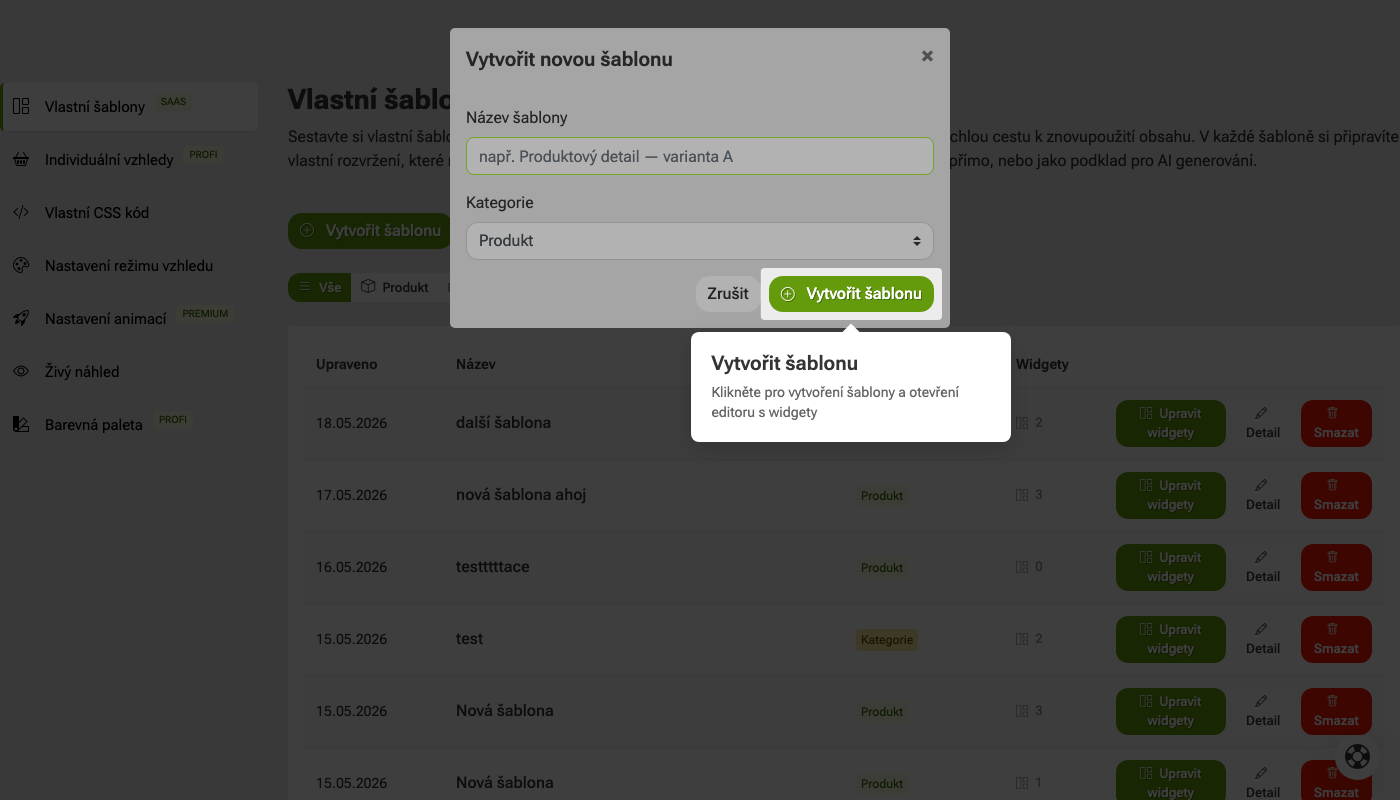
8. Create the template
Once you have filled in the template name and selected the category, click on the Create Template button.
This will save the template and open the editor where you can start assembling its content from individual widgets.
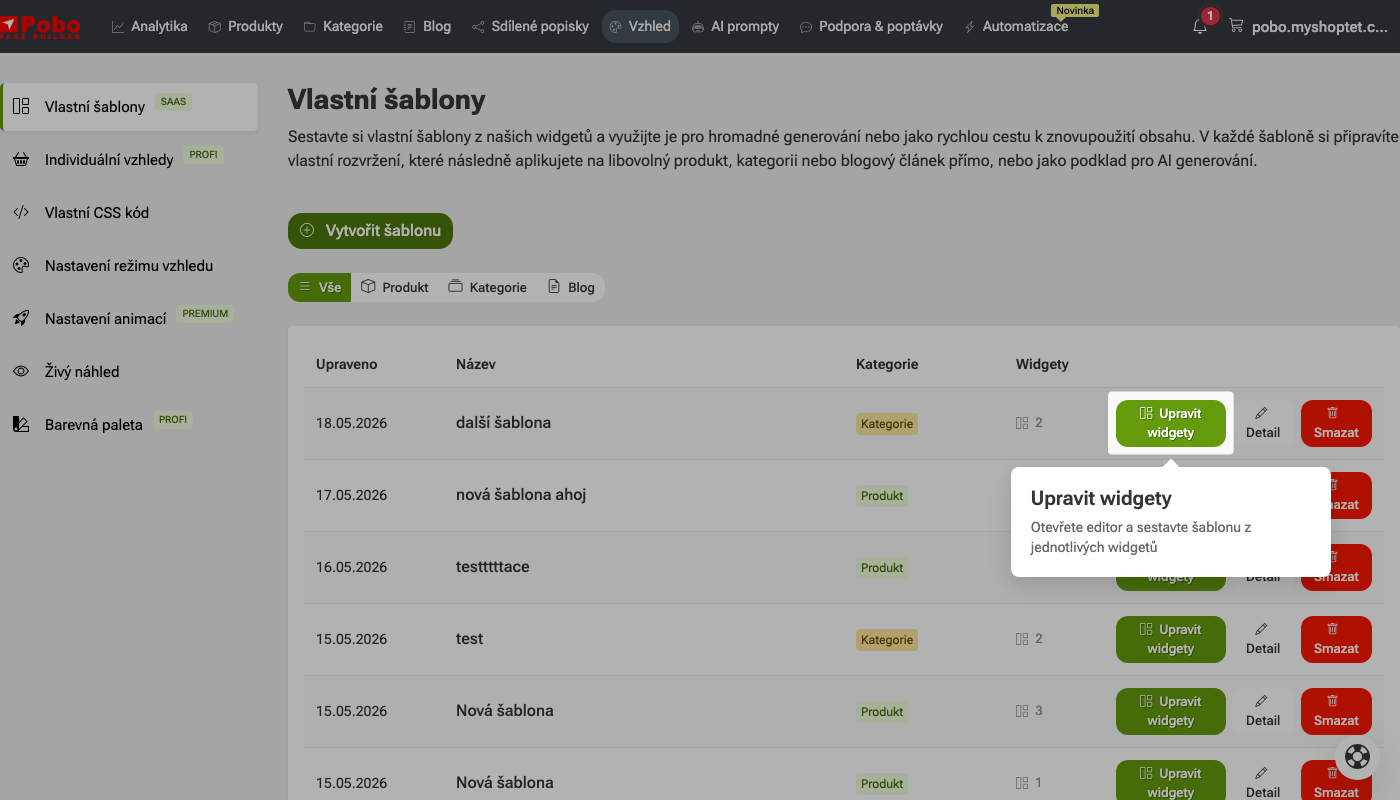
9. Edit widgets in the template
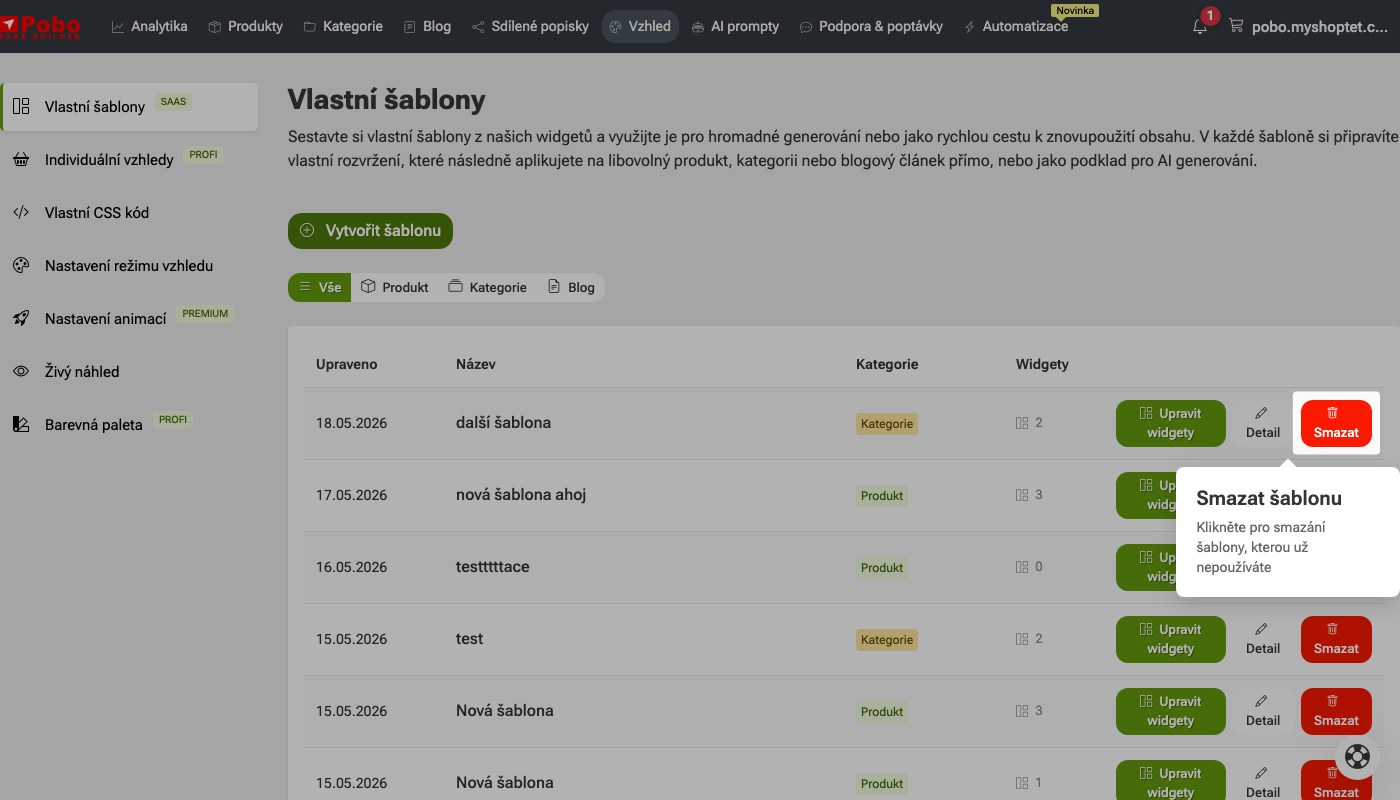
For each created template, you will find a Edit Widgets button. It is used to open the editor where you can further edit the template. For example, you can add new widgets, change their order, or edit the content of individual parts of the template.
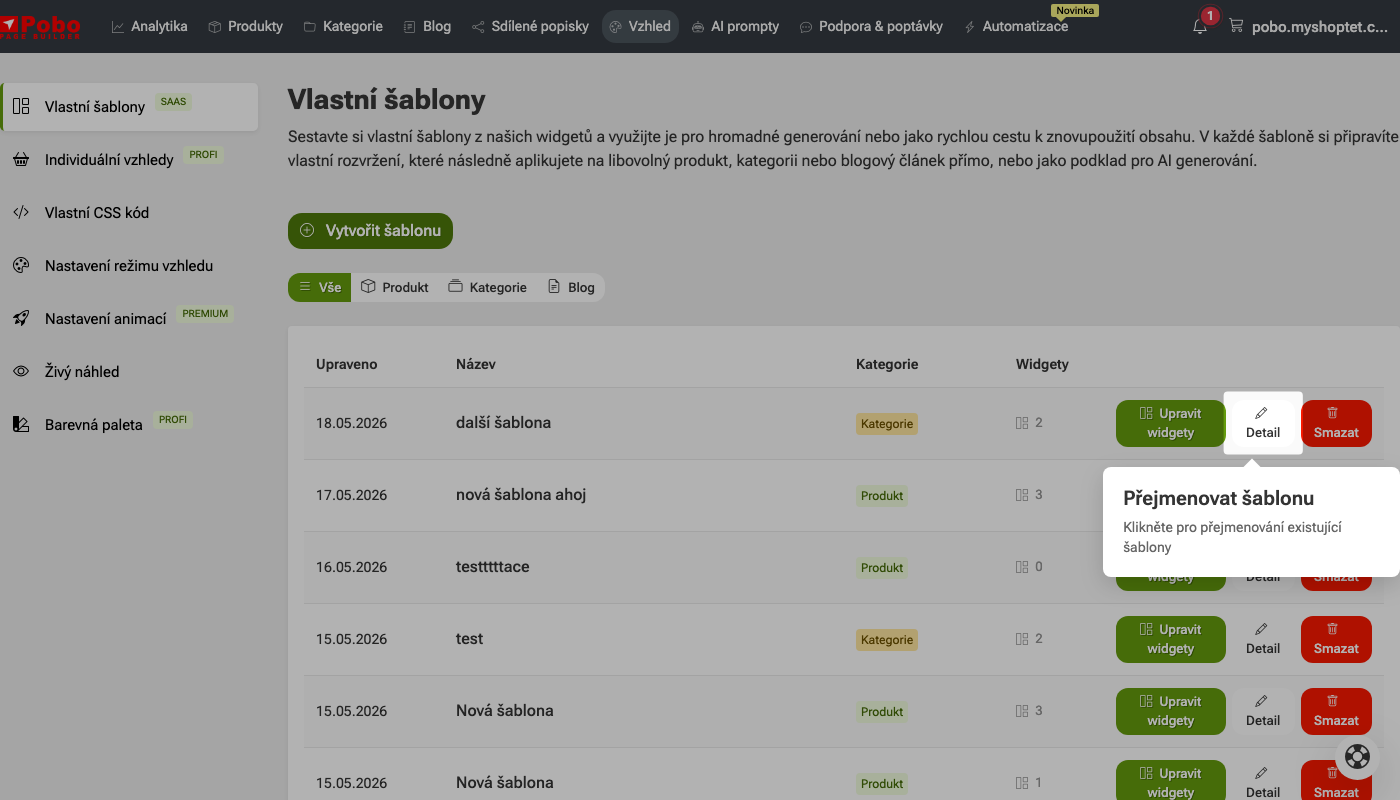
10. Edit template details
The Detail button is used to edit basic information about the template. Through it, you can, for example, change the name of an existing template to make it more organized and easily searchable in the list.
11. Delete an unnecessary template
The Delete button is used to remove a template that you no longer want to use. Before deleting, make sure you really don't need the template anymore, because after removal, it will no longer be available in the list of custom templates.

I am very satisfied with Pobo Page Builder. We use it mainly for editing product pages and our blog.
Quick navigation

Thinking about Pobo? Let us show it to you.
Book a short 30-minute call where we'll show you how Pobo works, what it's good for, and how it can save you a lot of time and money.
Book a call


Book a call