


 Rezervovat hovor
Jak psát popisky pro produkty, kategorie a blog?
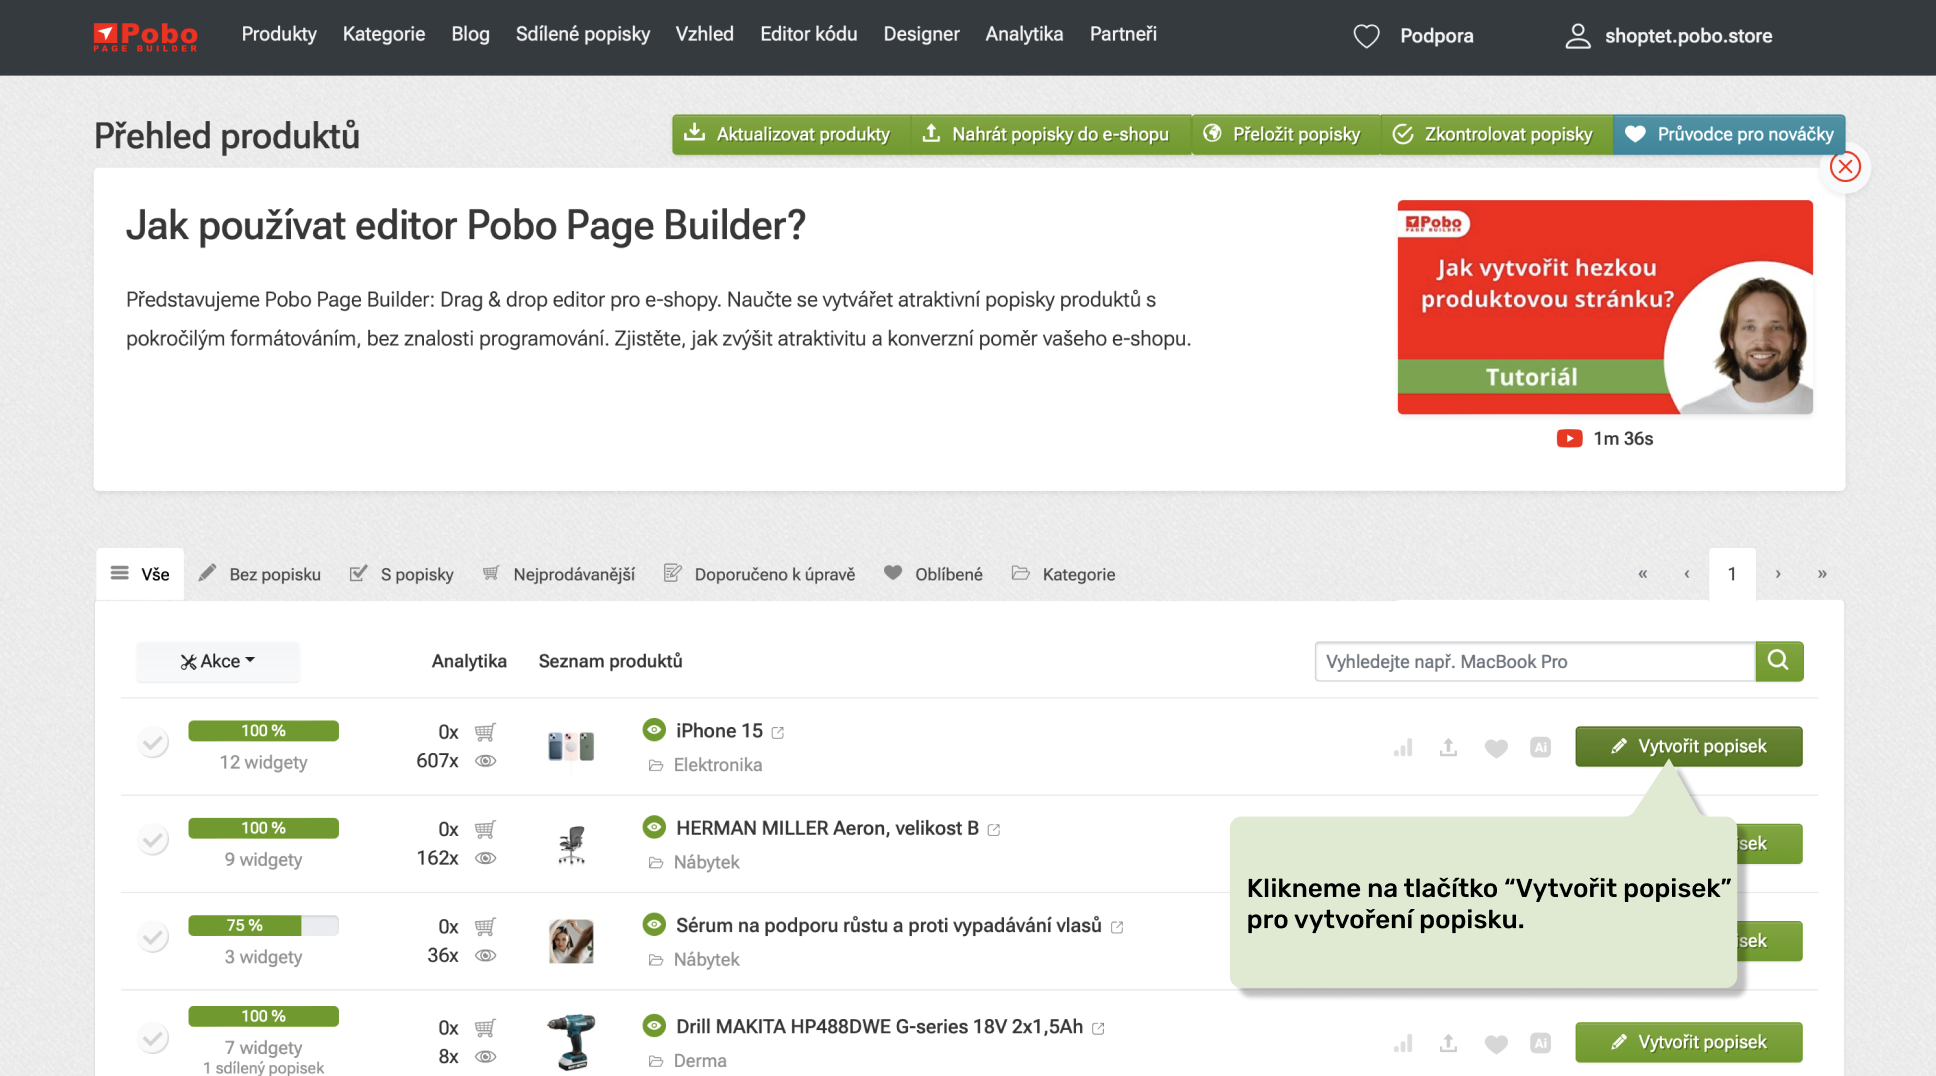 Klikneme na tlačítko pro vytvoření obsahu
 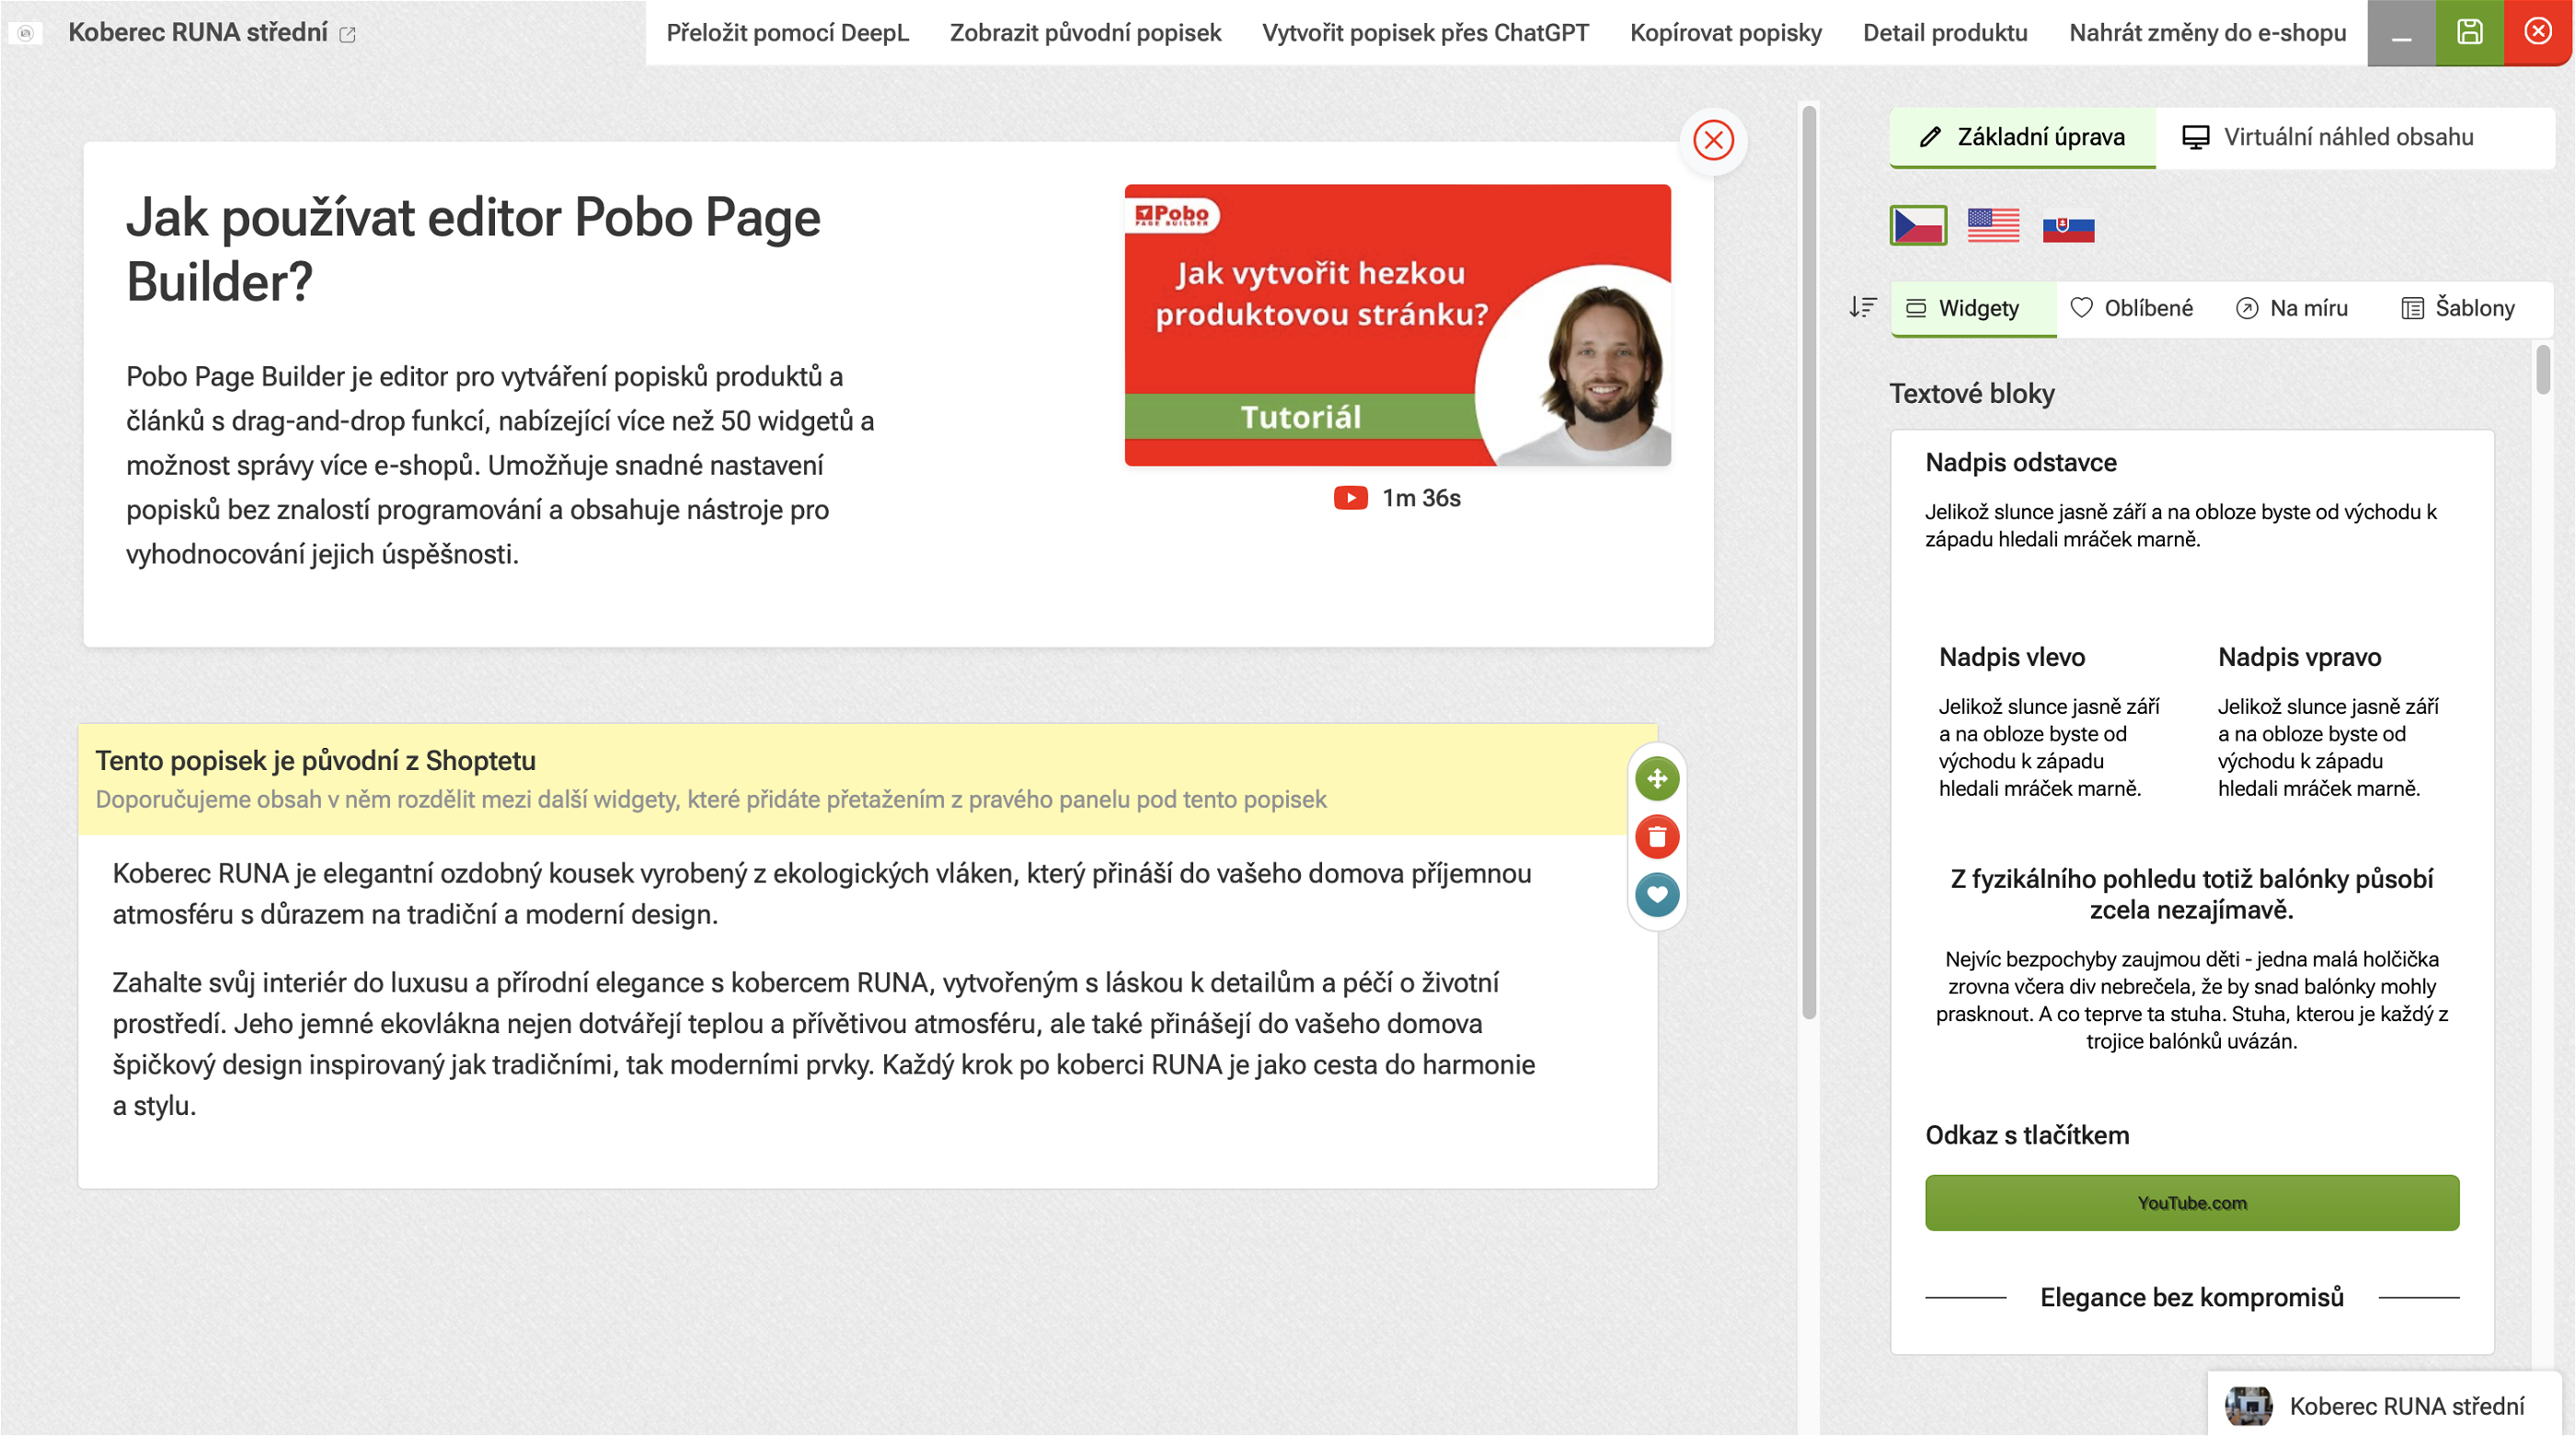 Editace jednotlivého produktu po otevření
 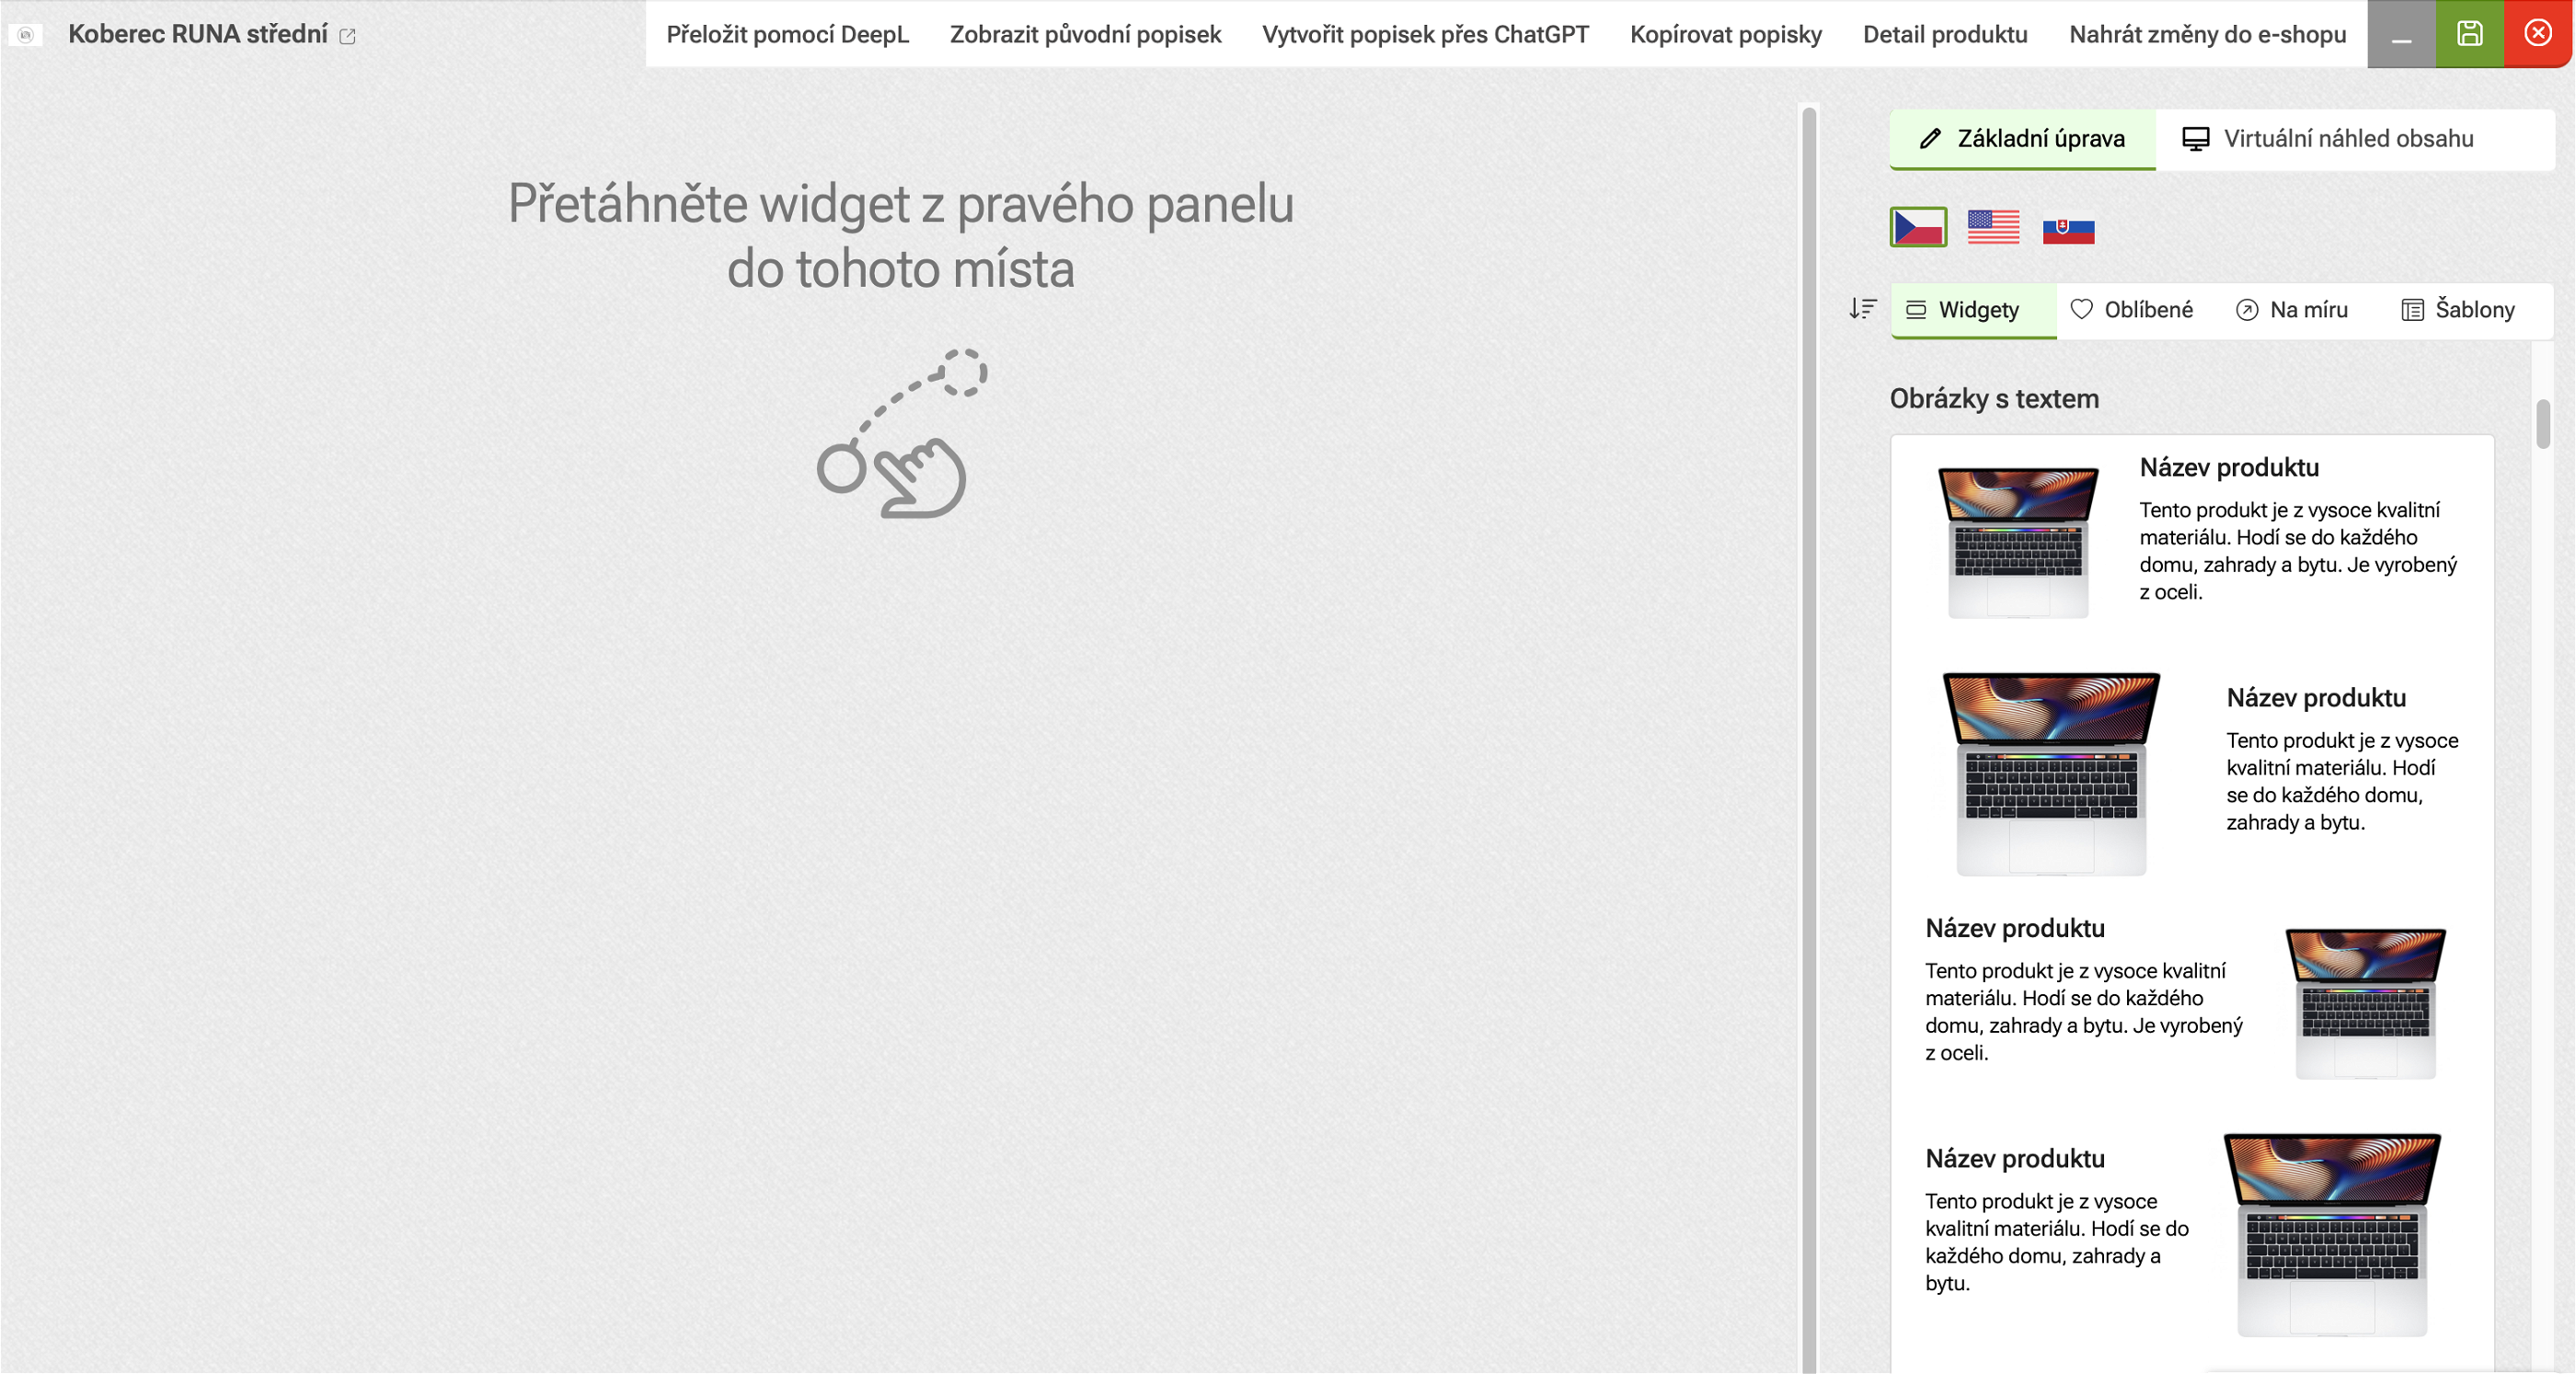 Přetáhneme widget ze seznamu do levé části
 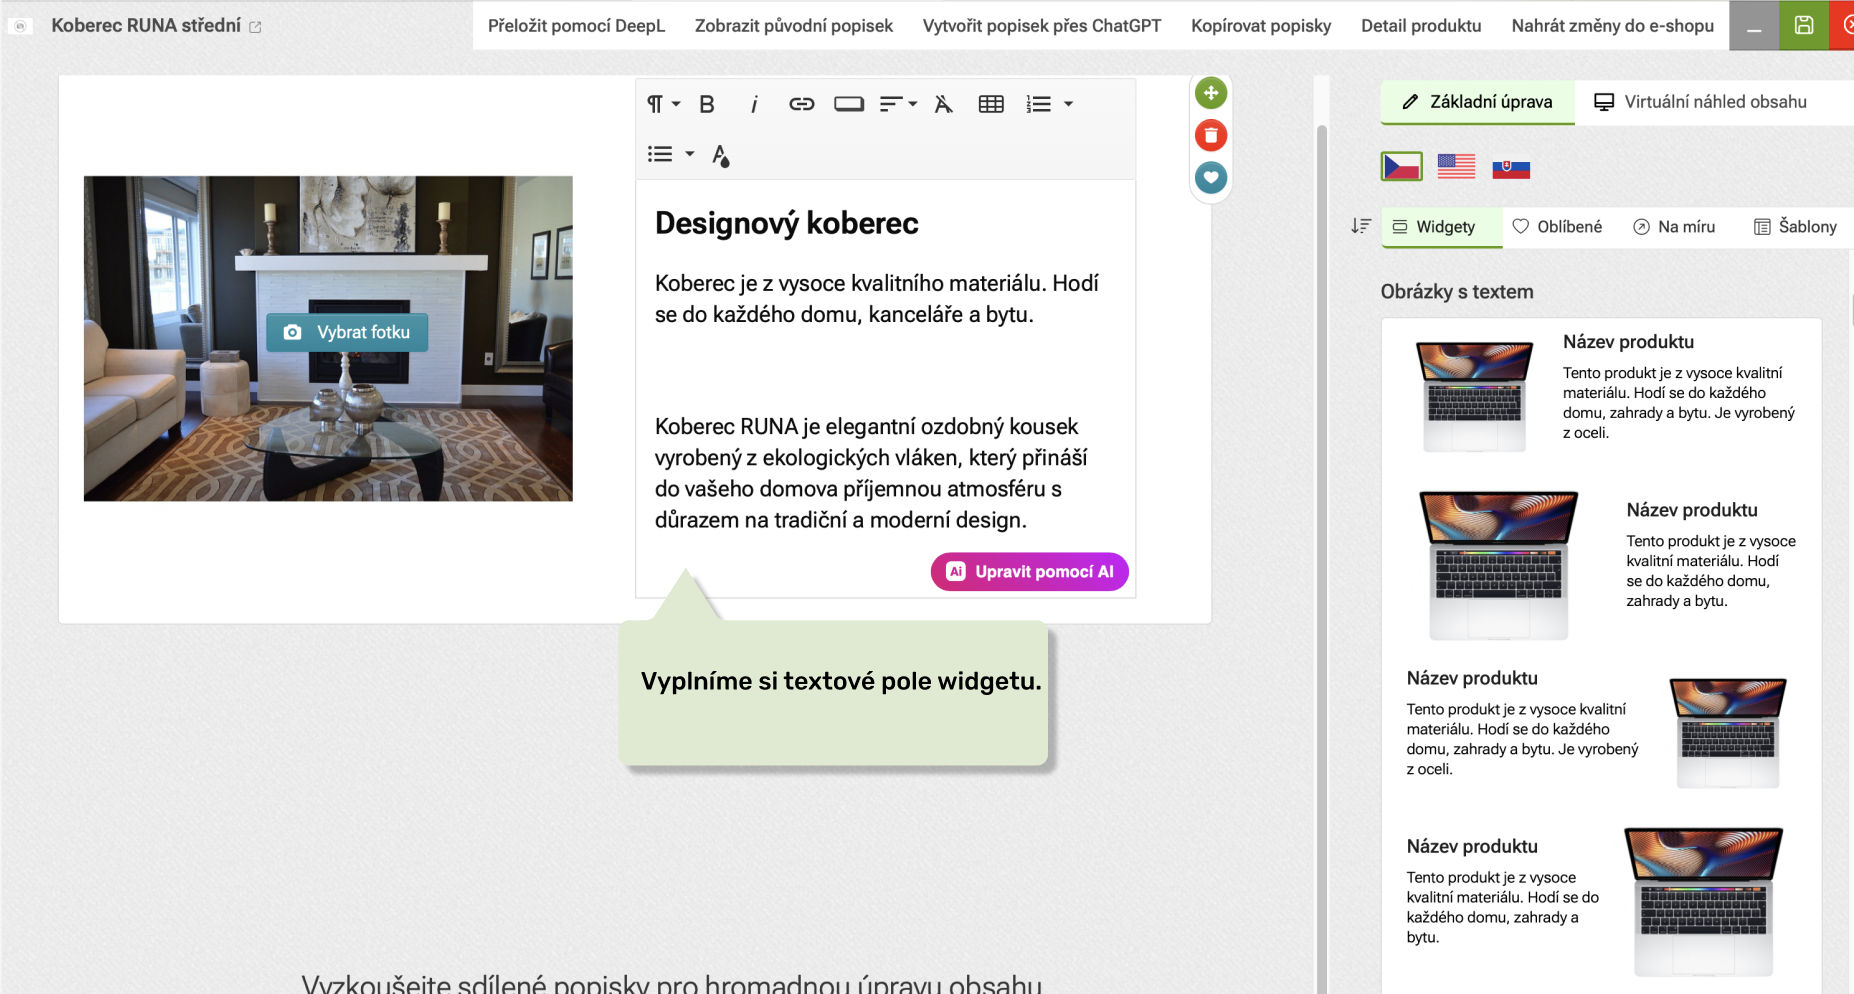 Vyplníme obsah textu
 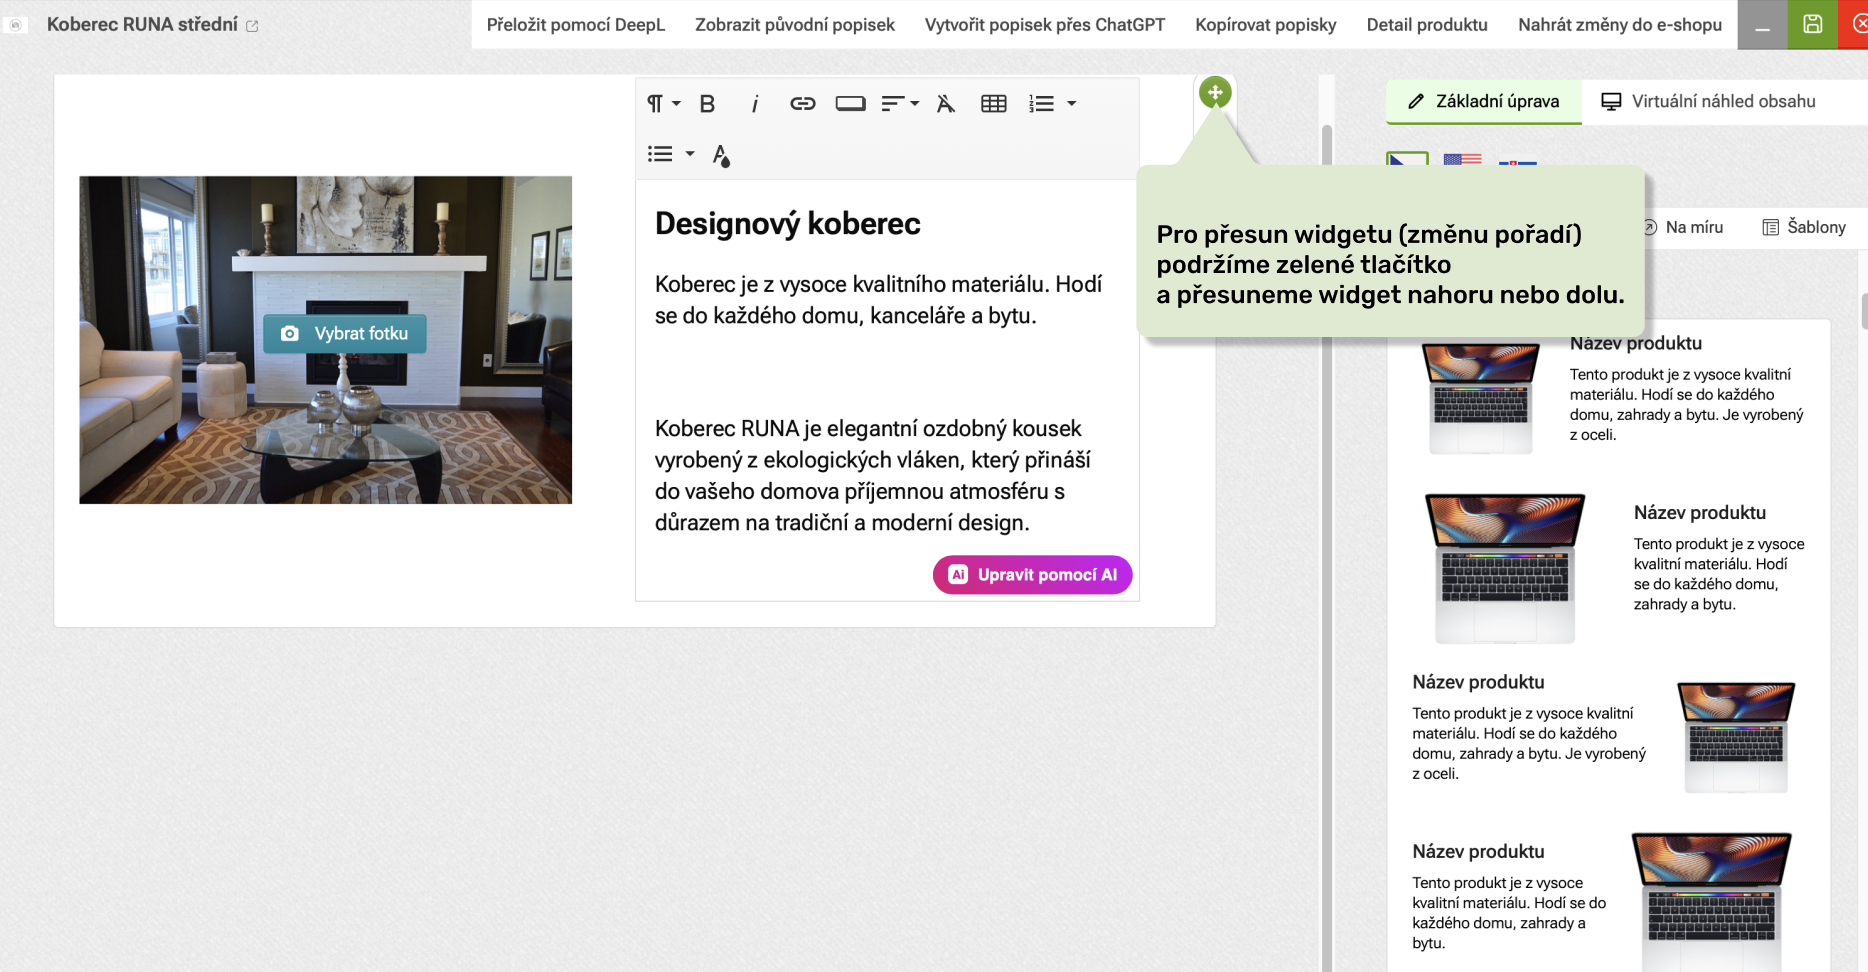 Pro přesun widgetu použijeme zelené tlačítko
  Pro smazání widgetu klikneme na červené tlačítko
 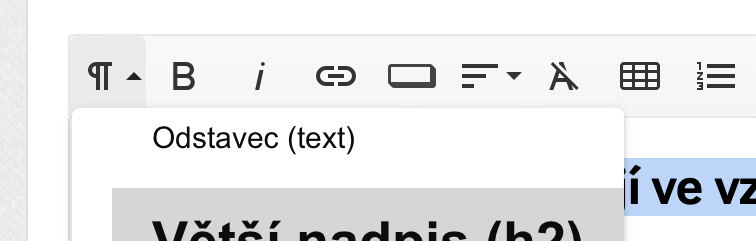 Práce s wysiwyg editorem
 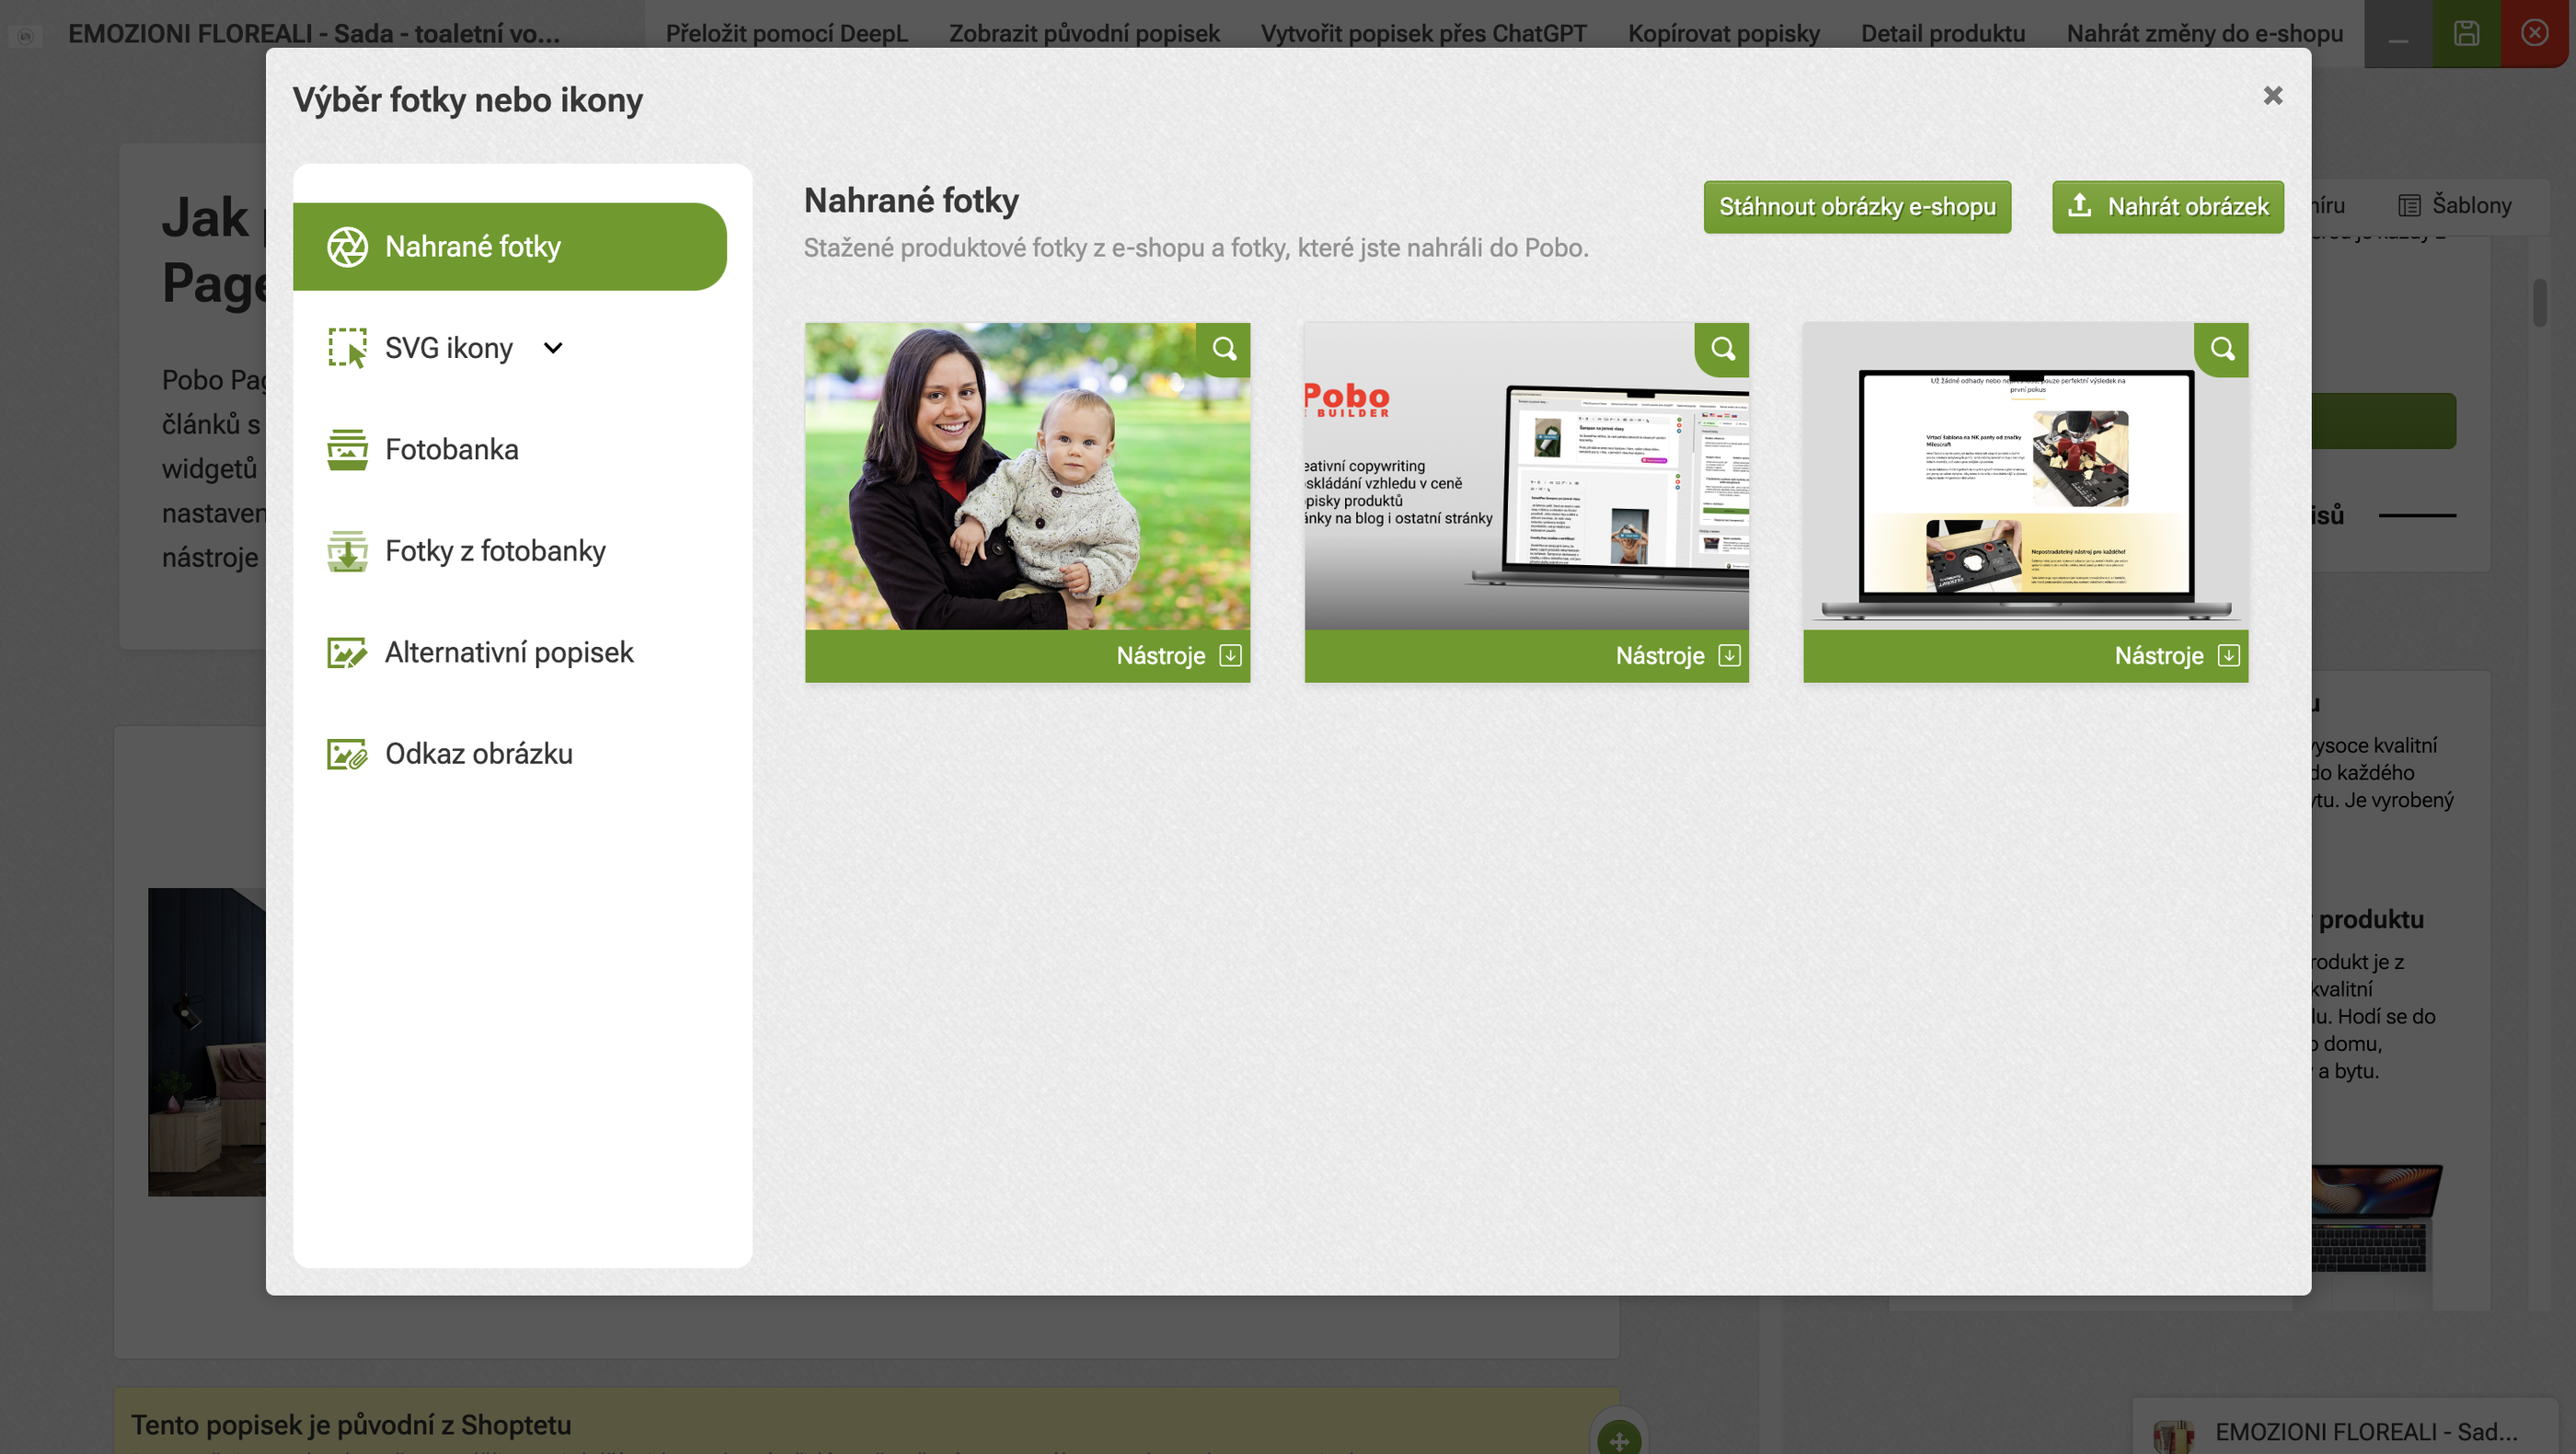 Produktové obrázky
 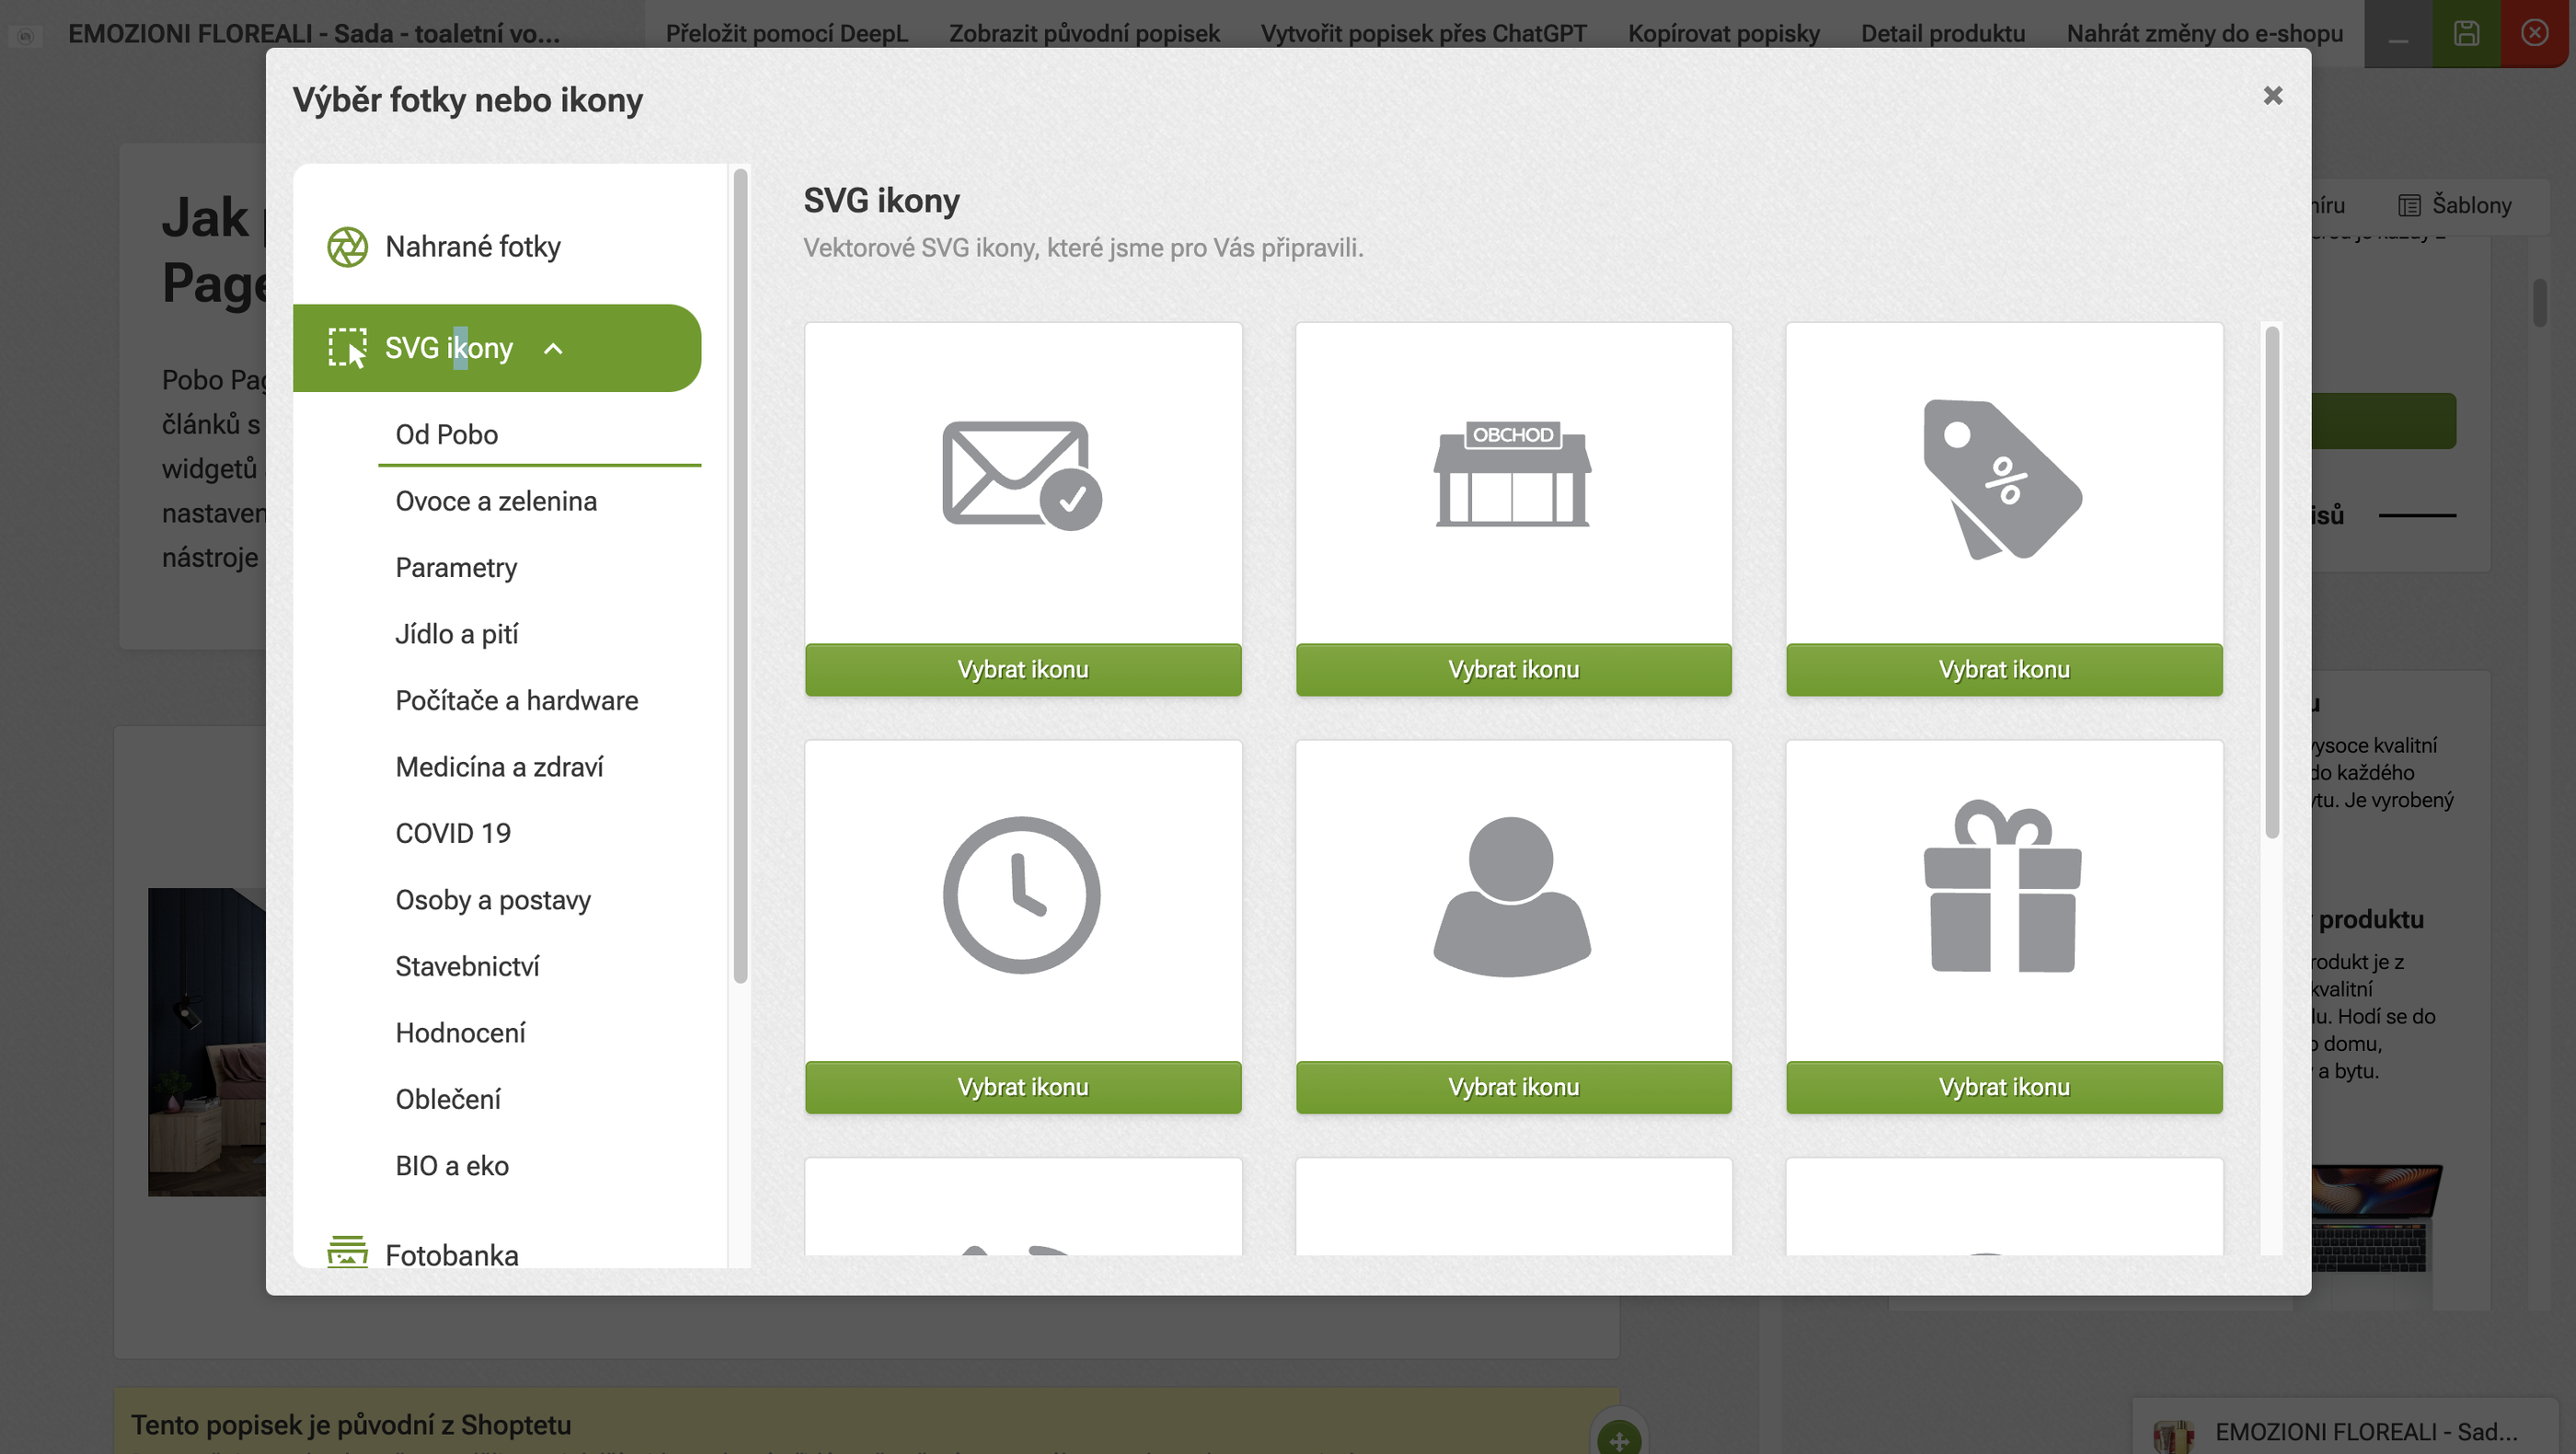 Výběr SVG ikon
 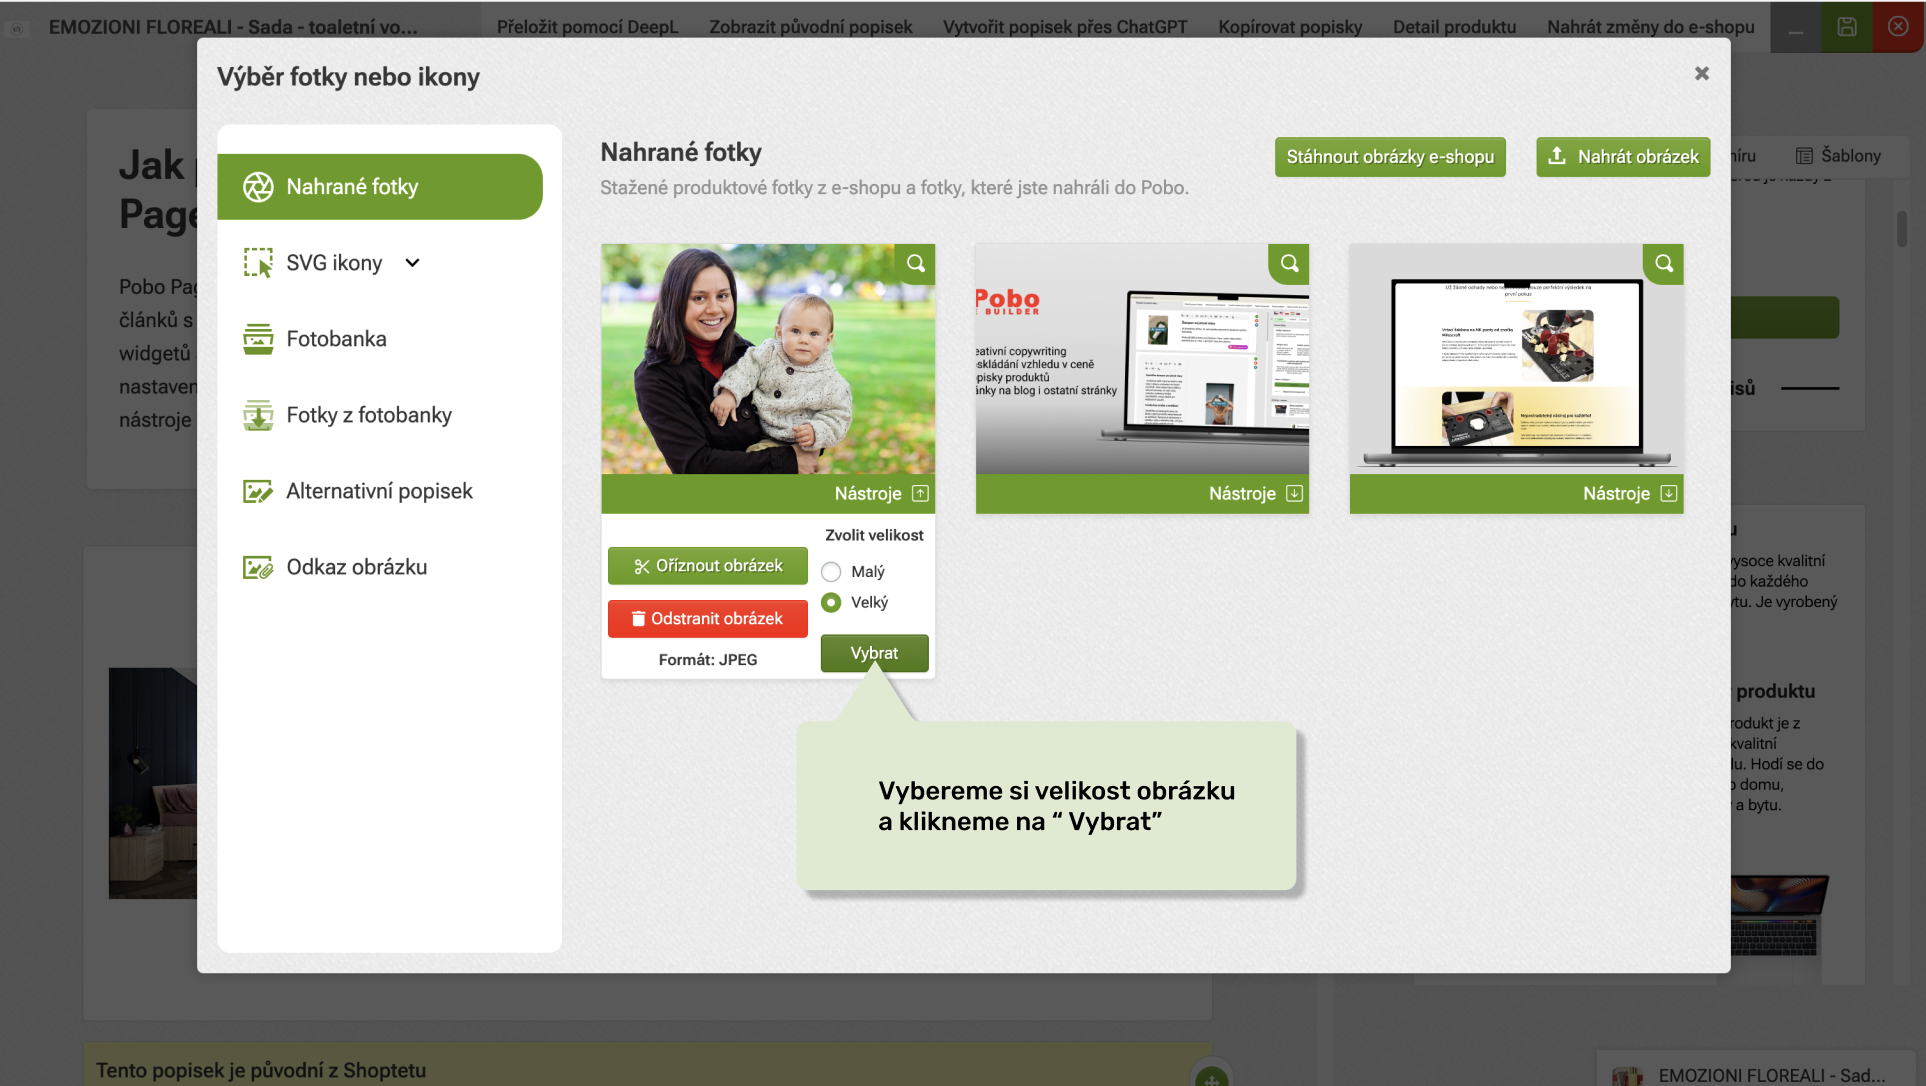 Možnost volby velikosti, která se použije ve widgetu
 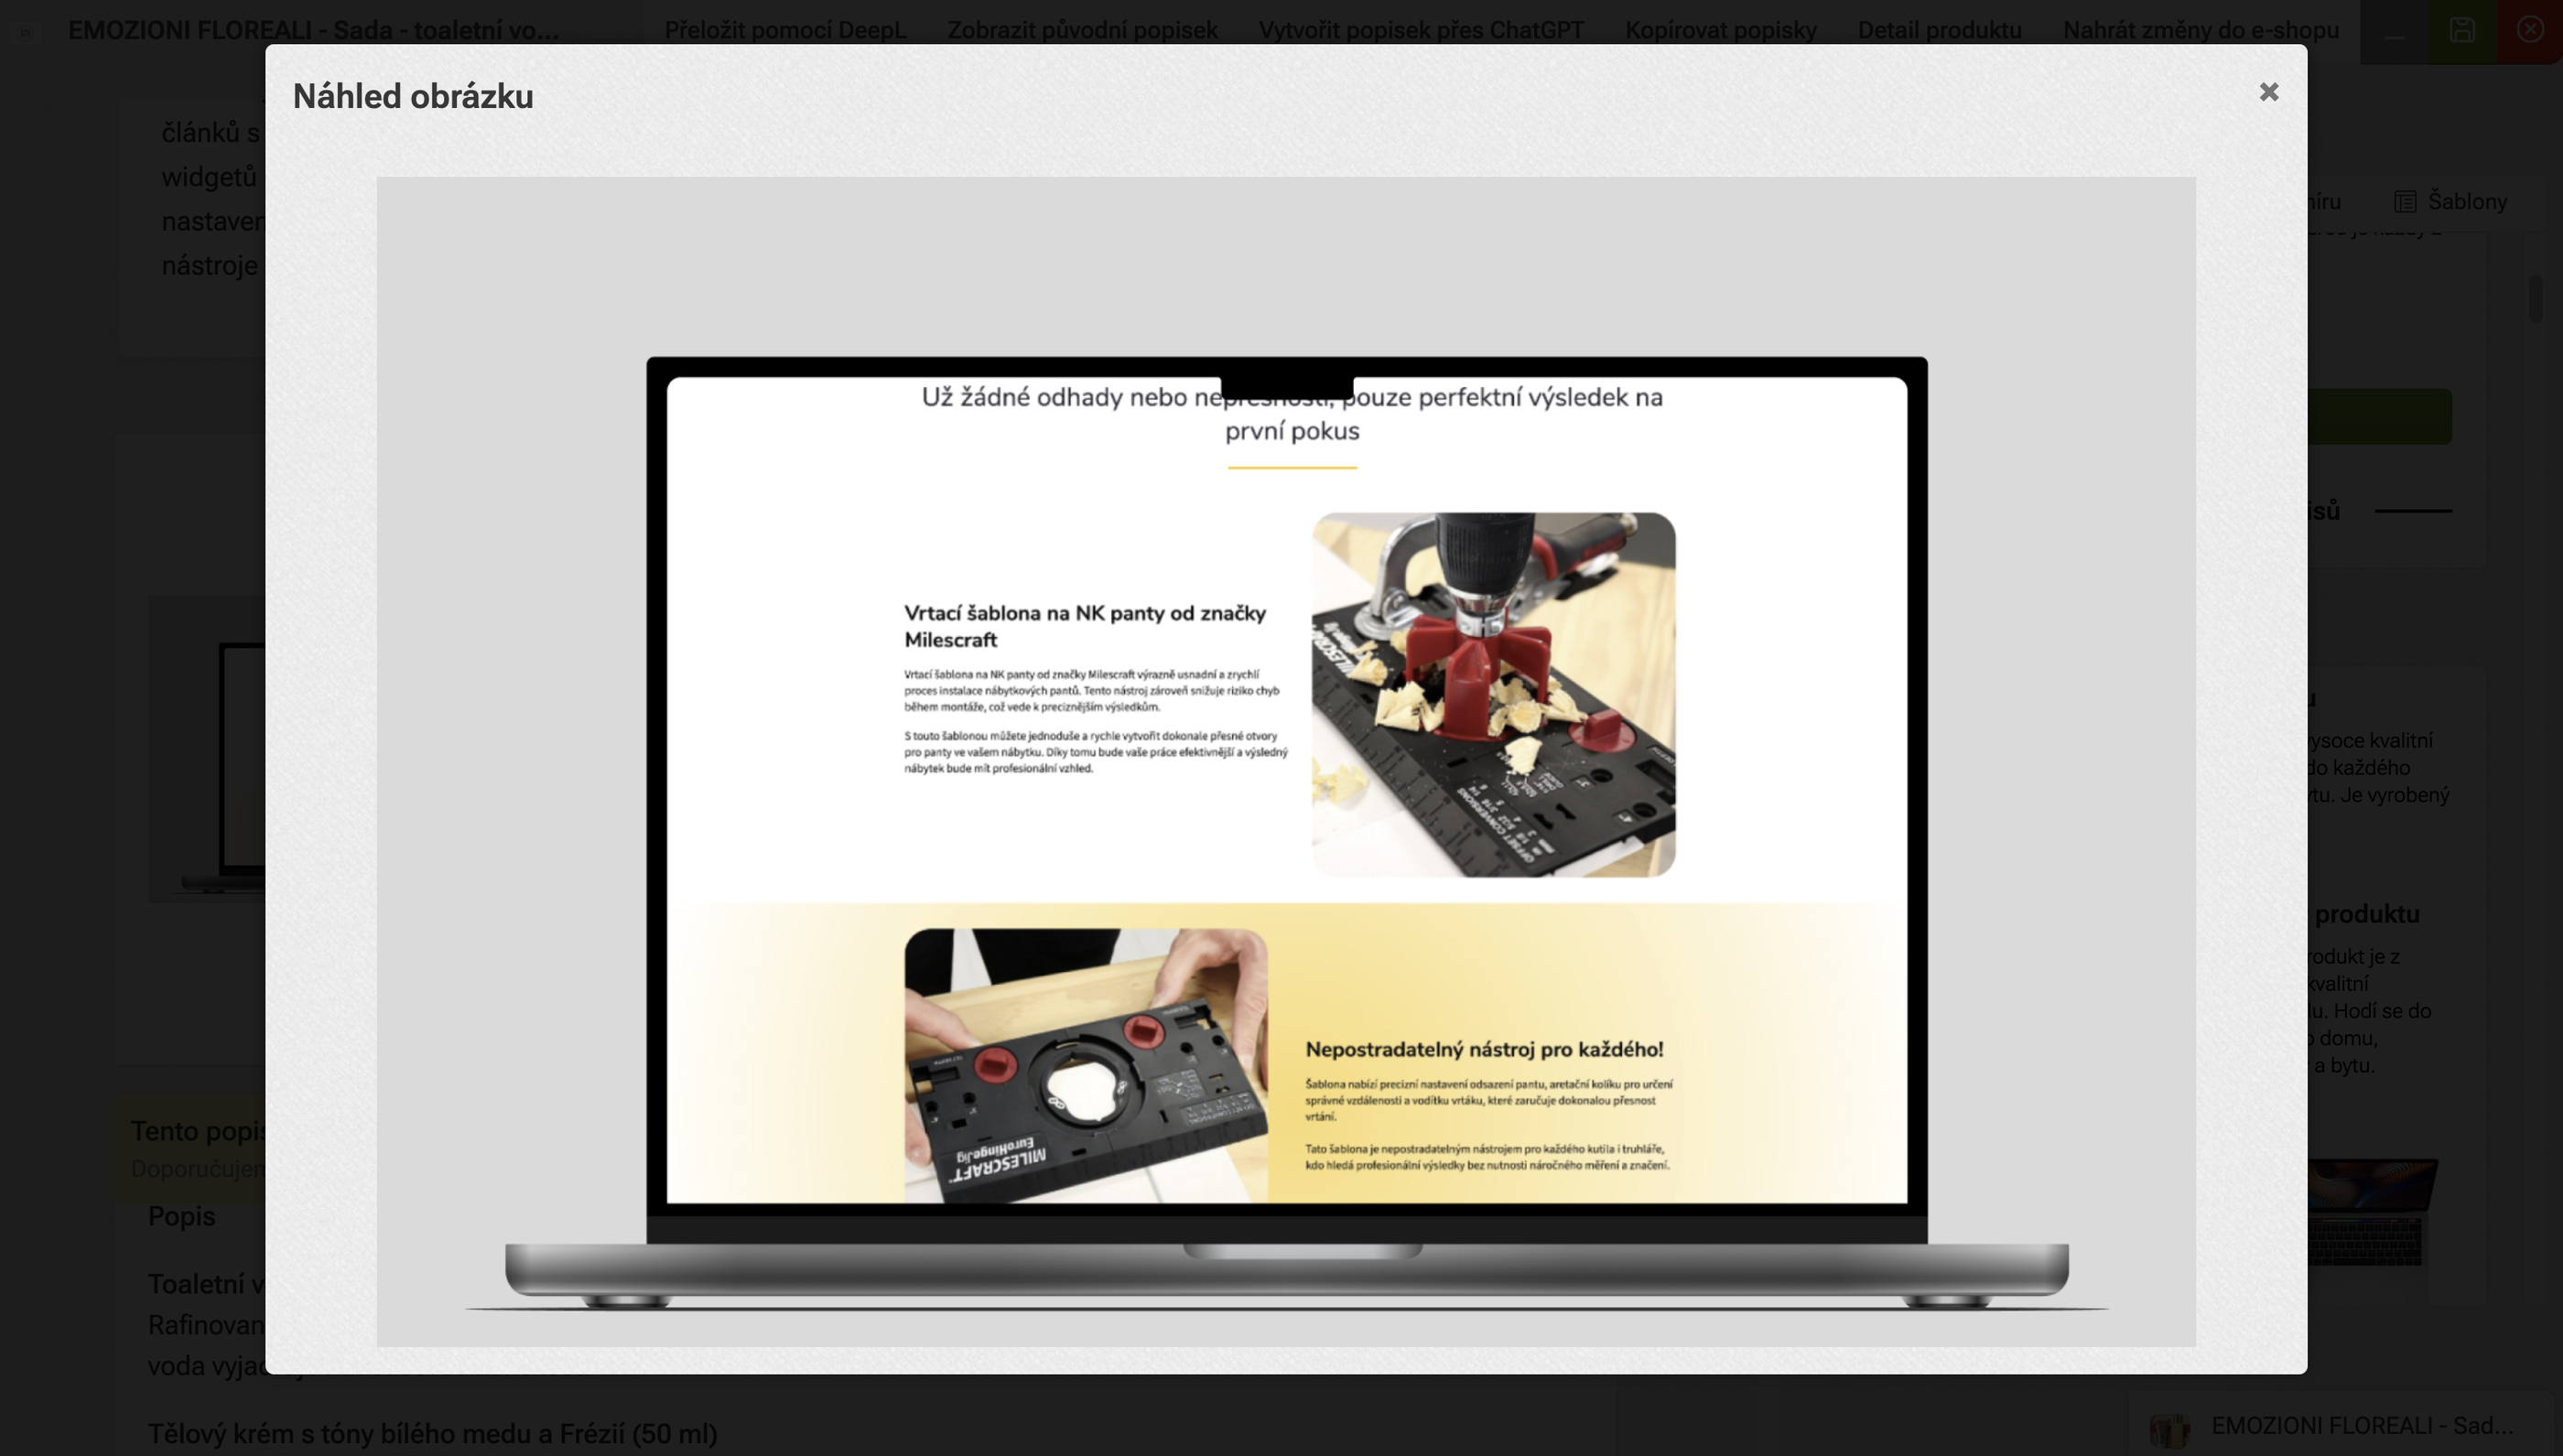 Náhled obrázku ve vyšším rozlišení
 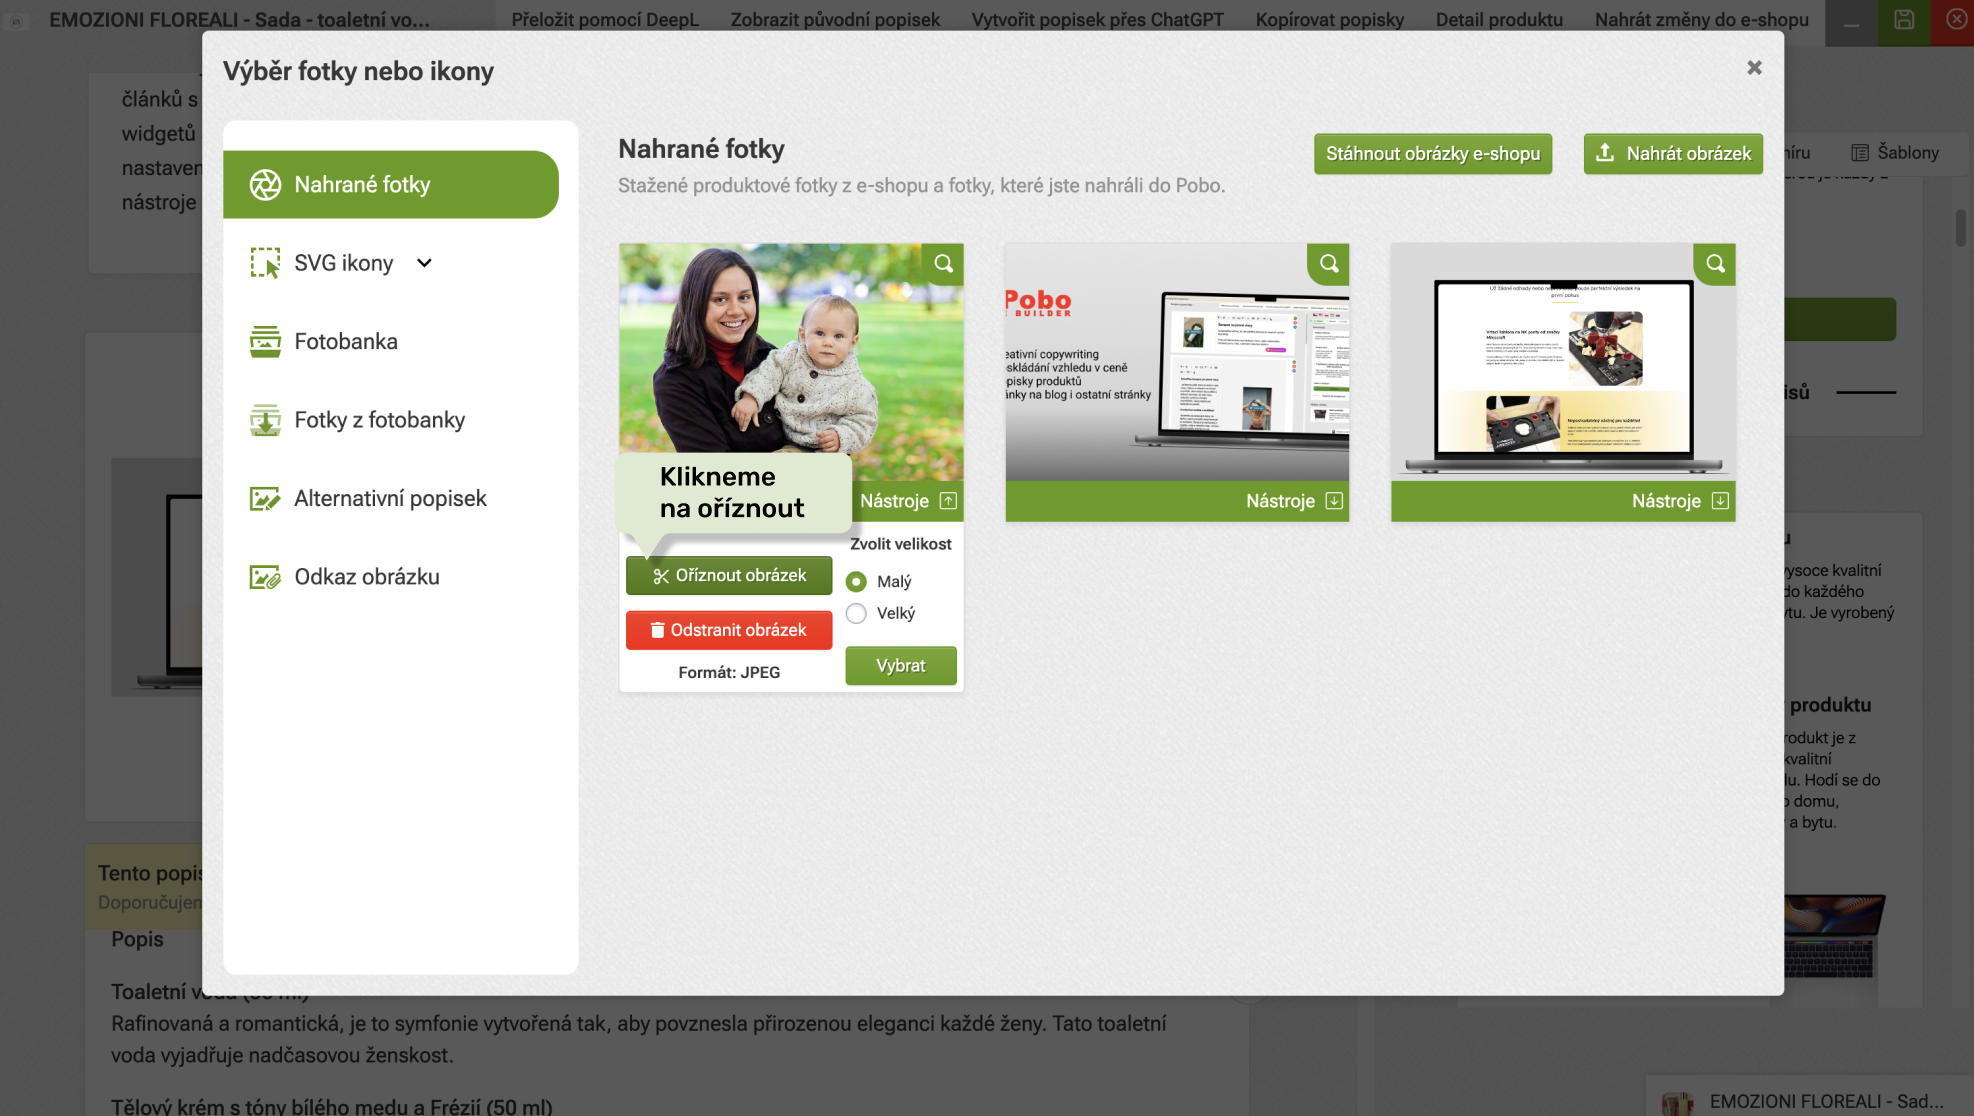 U vybrané fotky klikneme na tlačítko "Oříznout obrázek"
 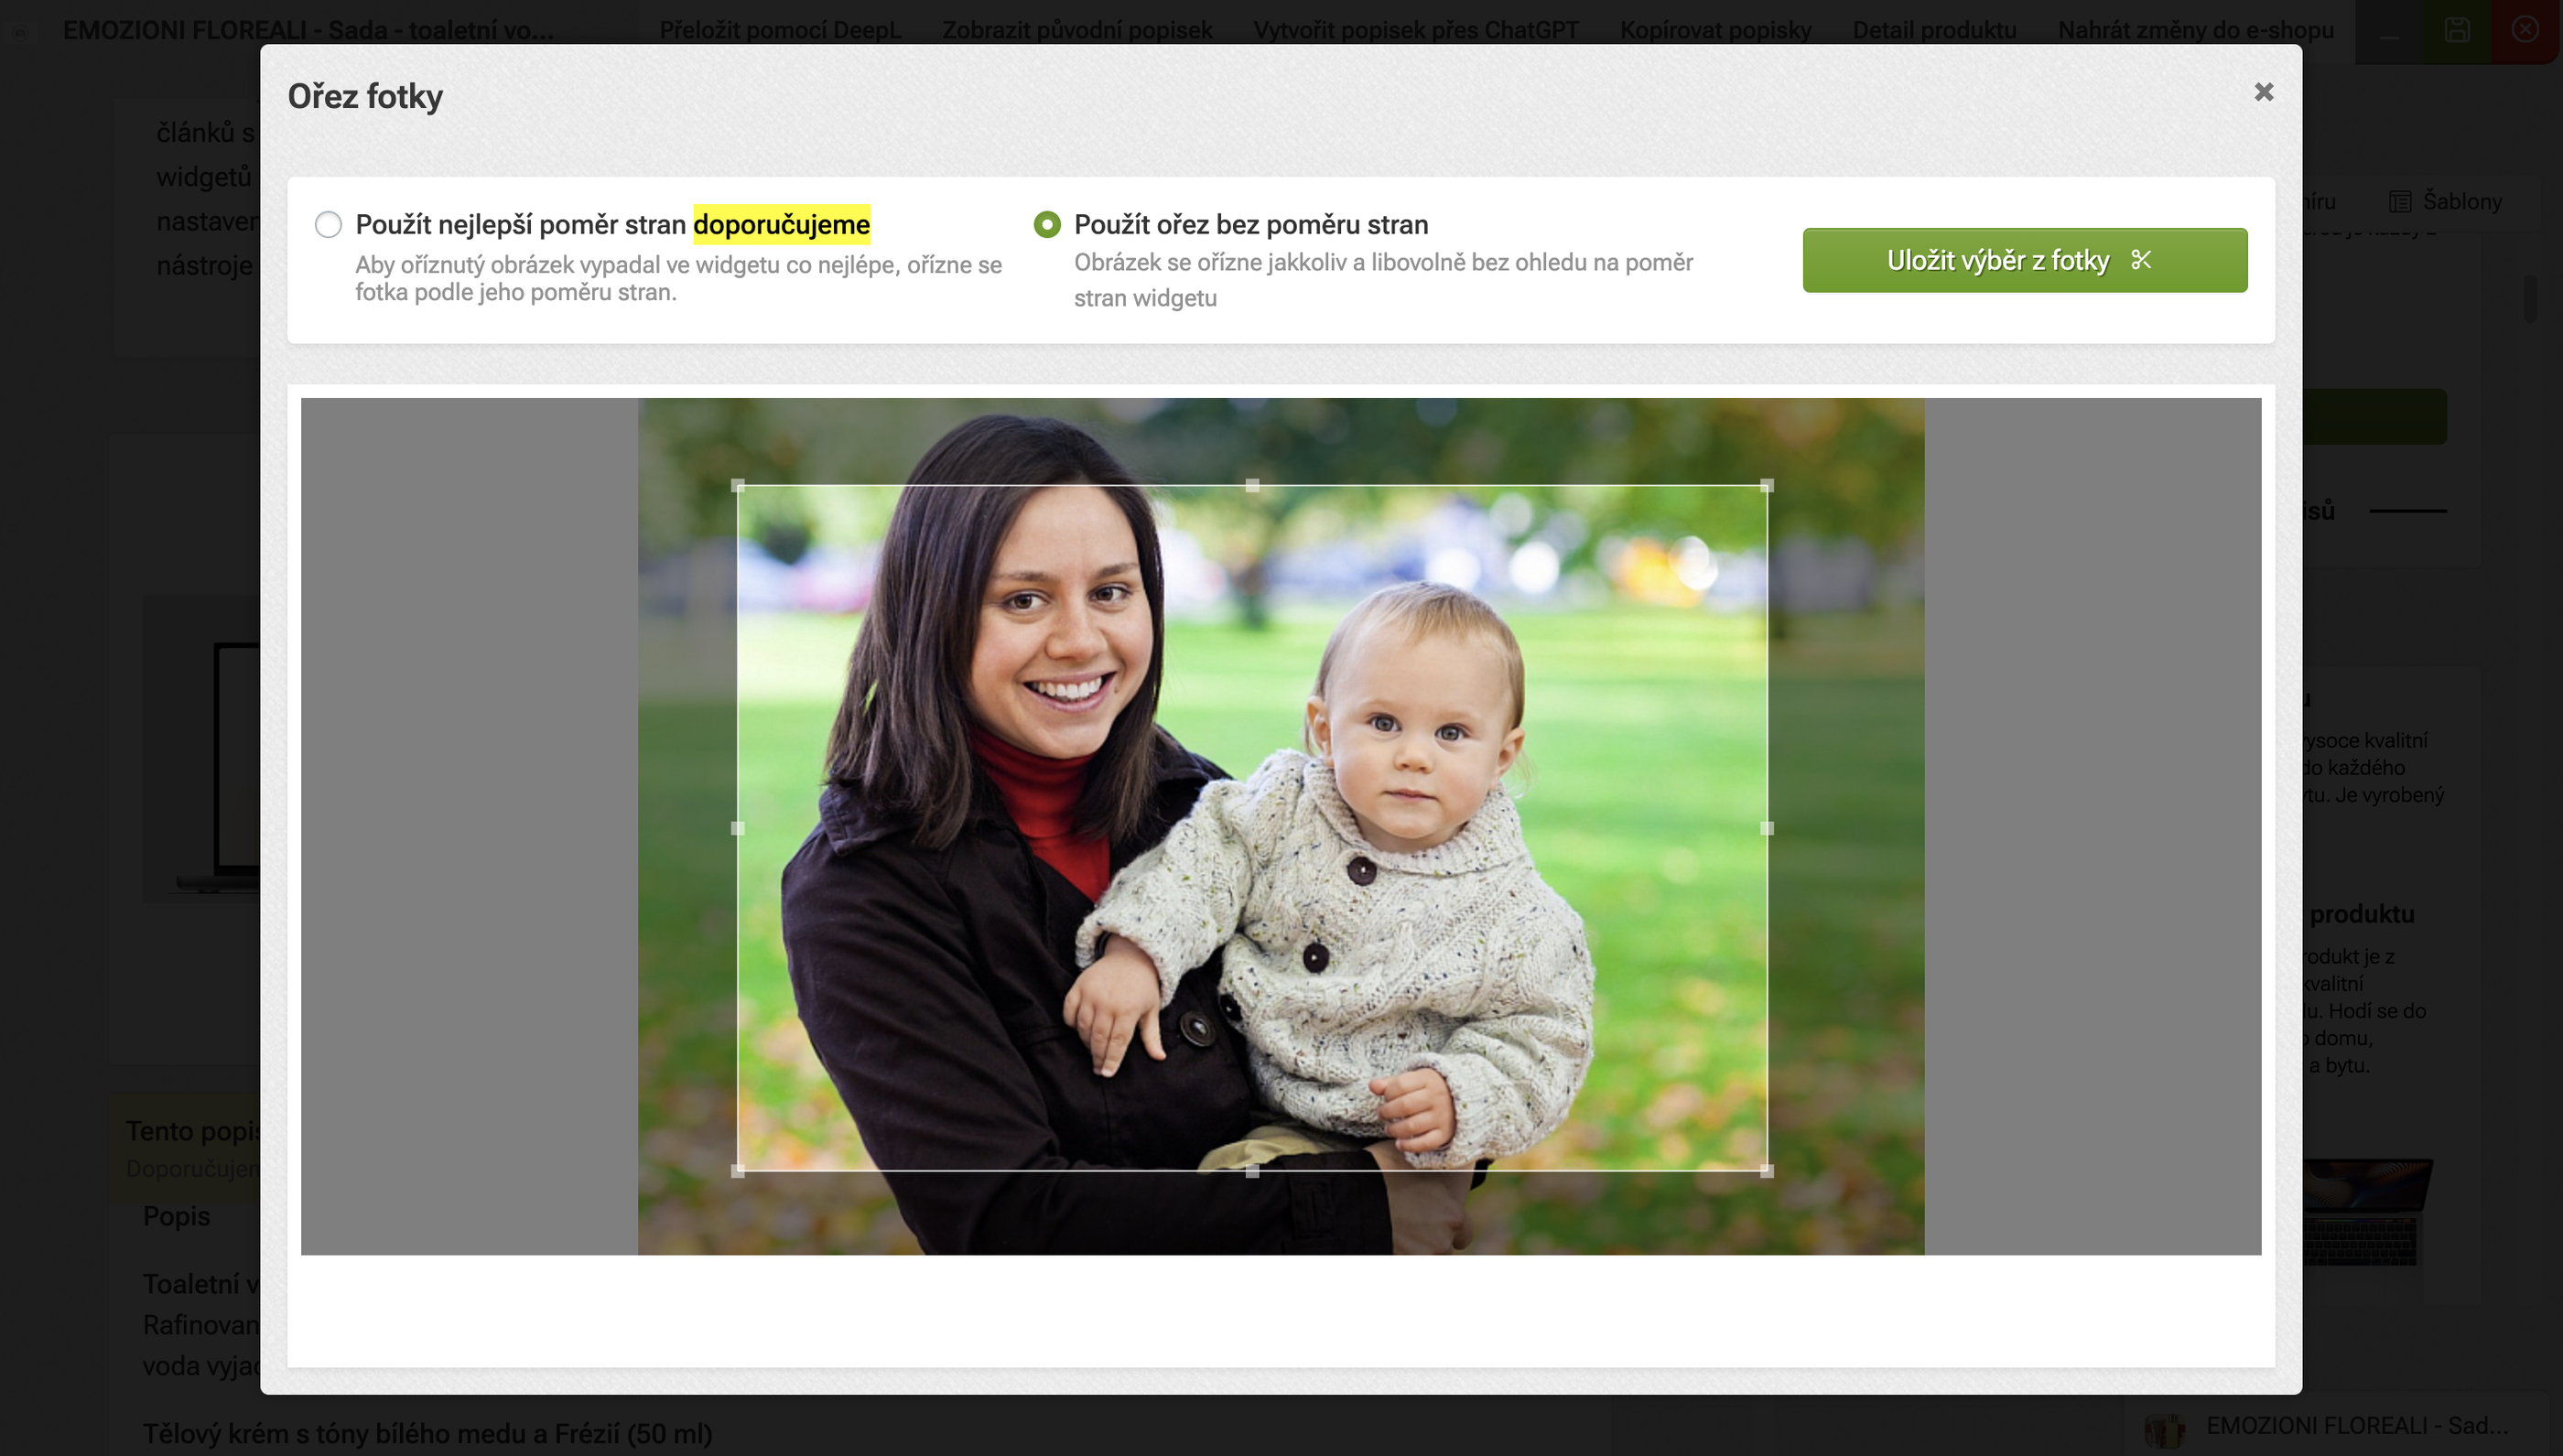 Vybereme výřez a uložíme
 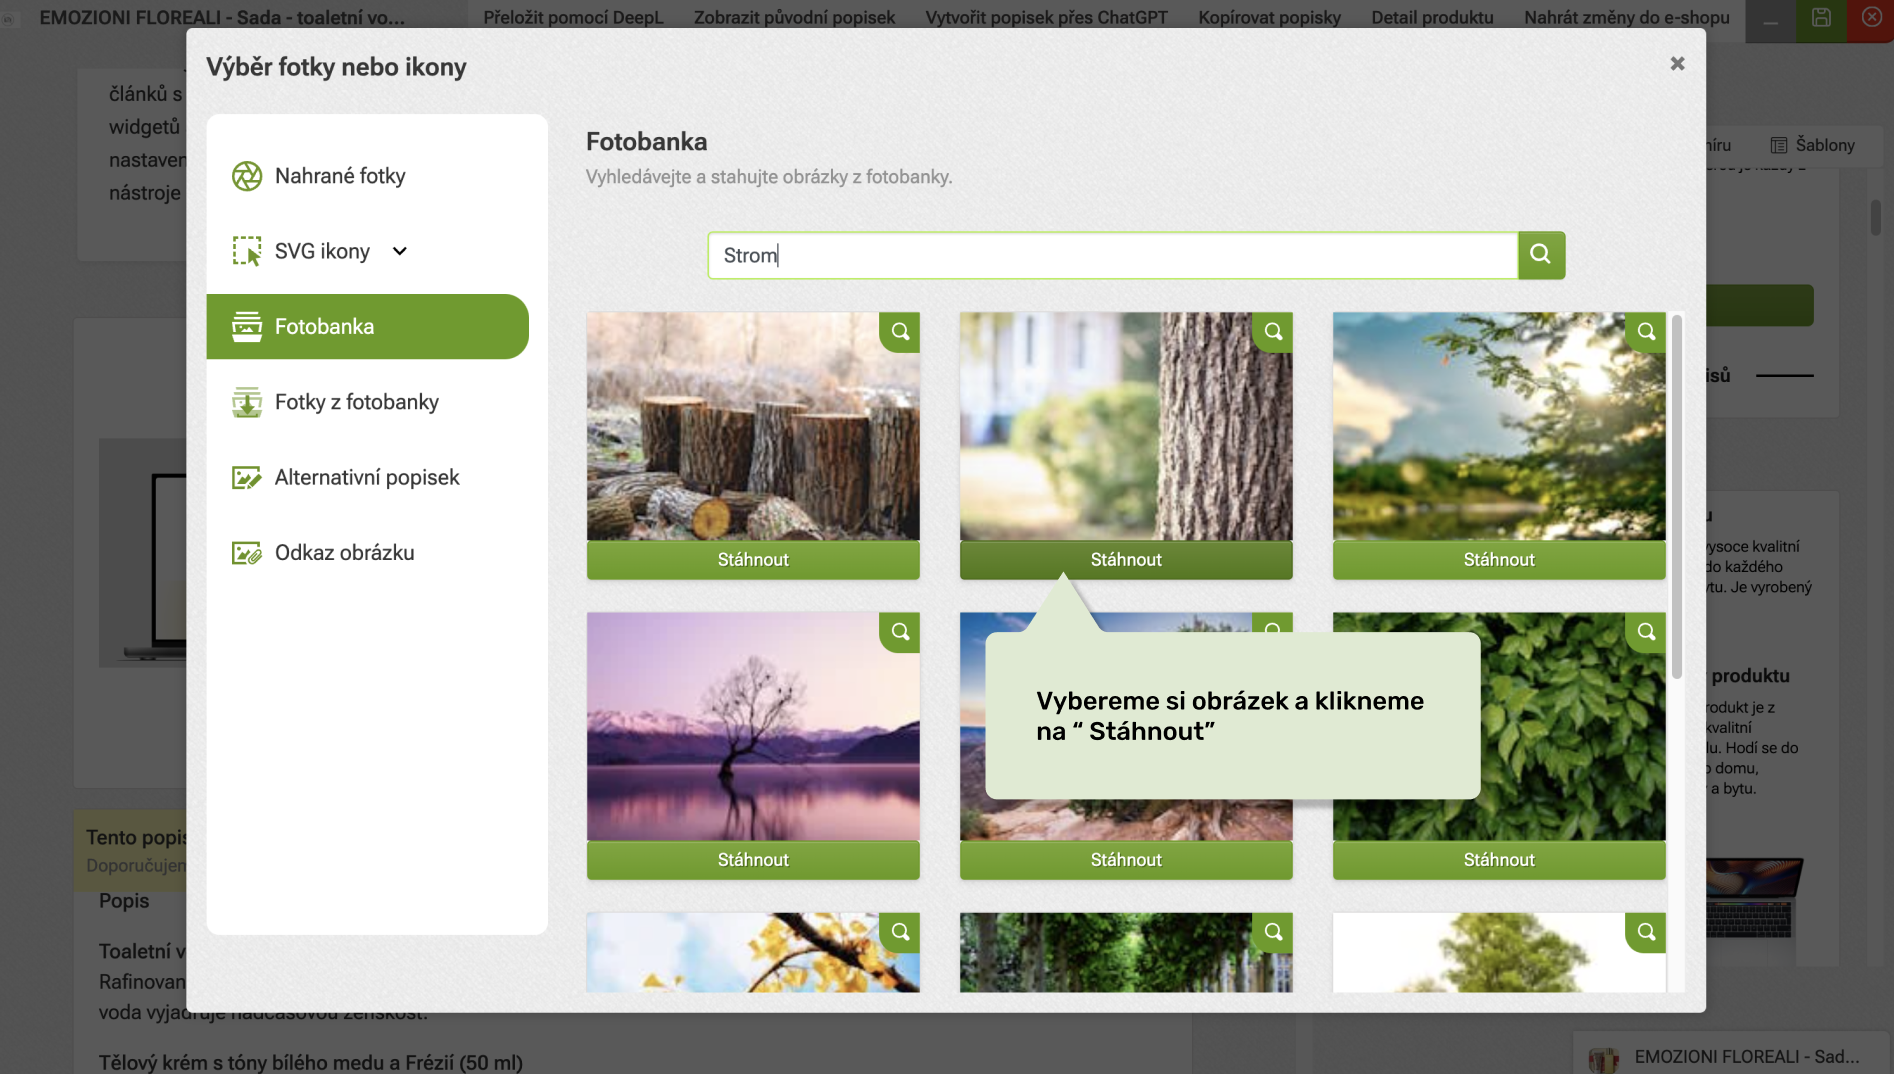 Fotobanka
 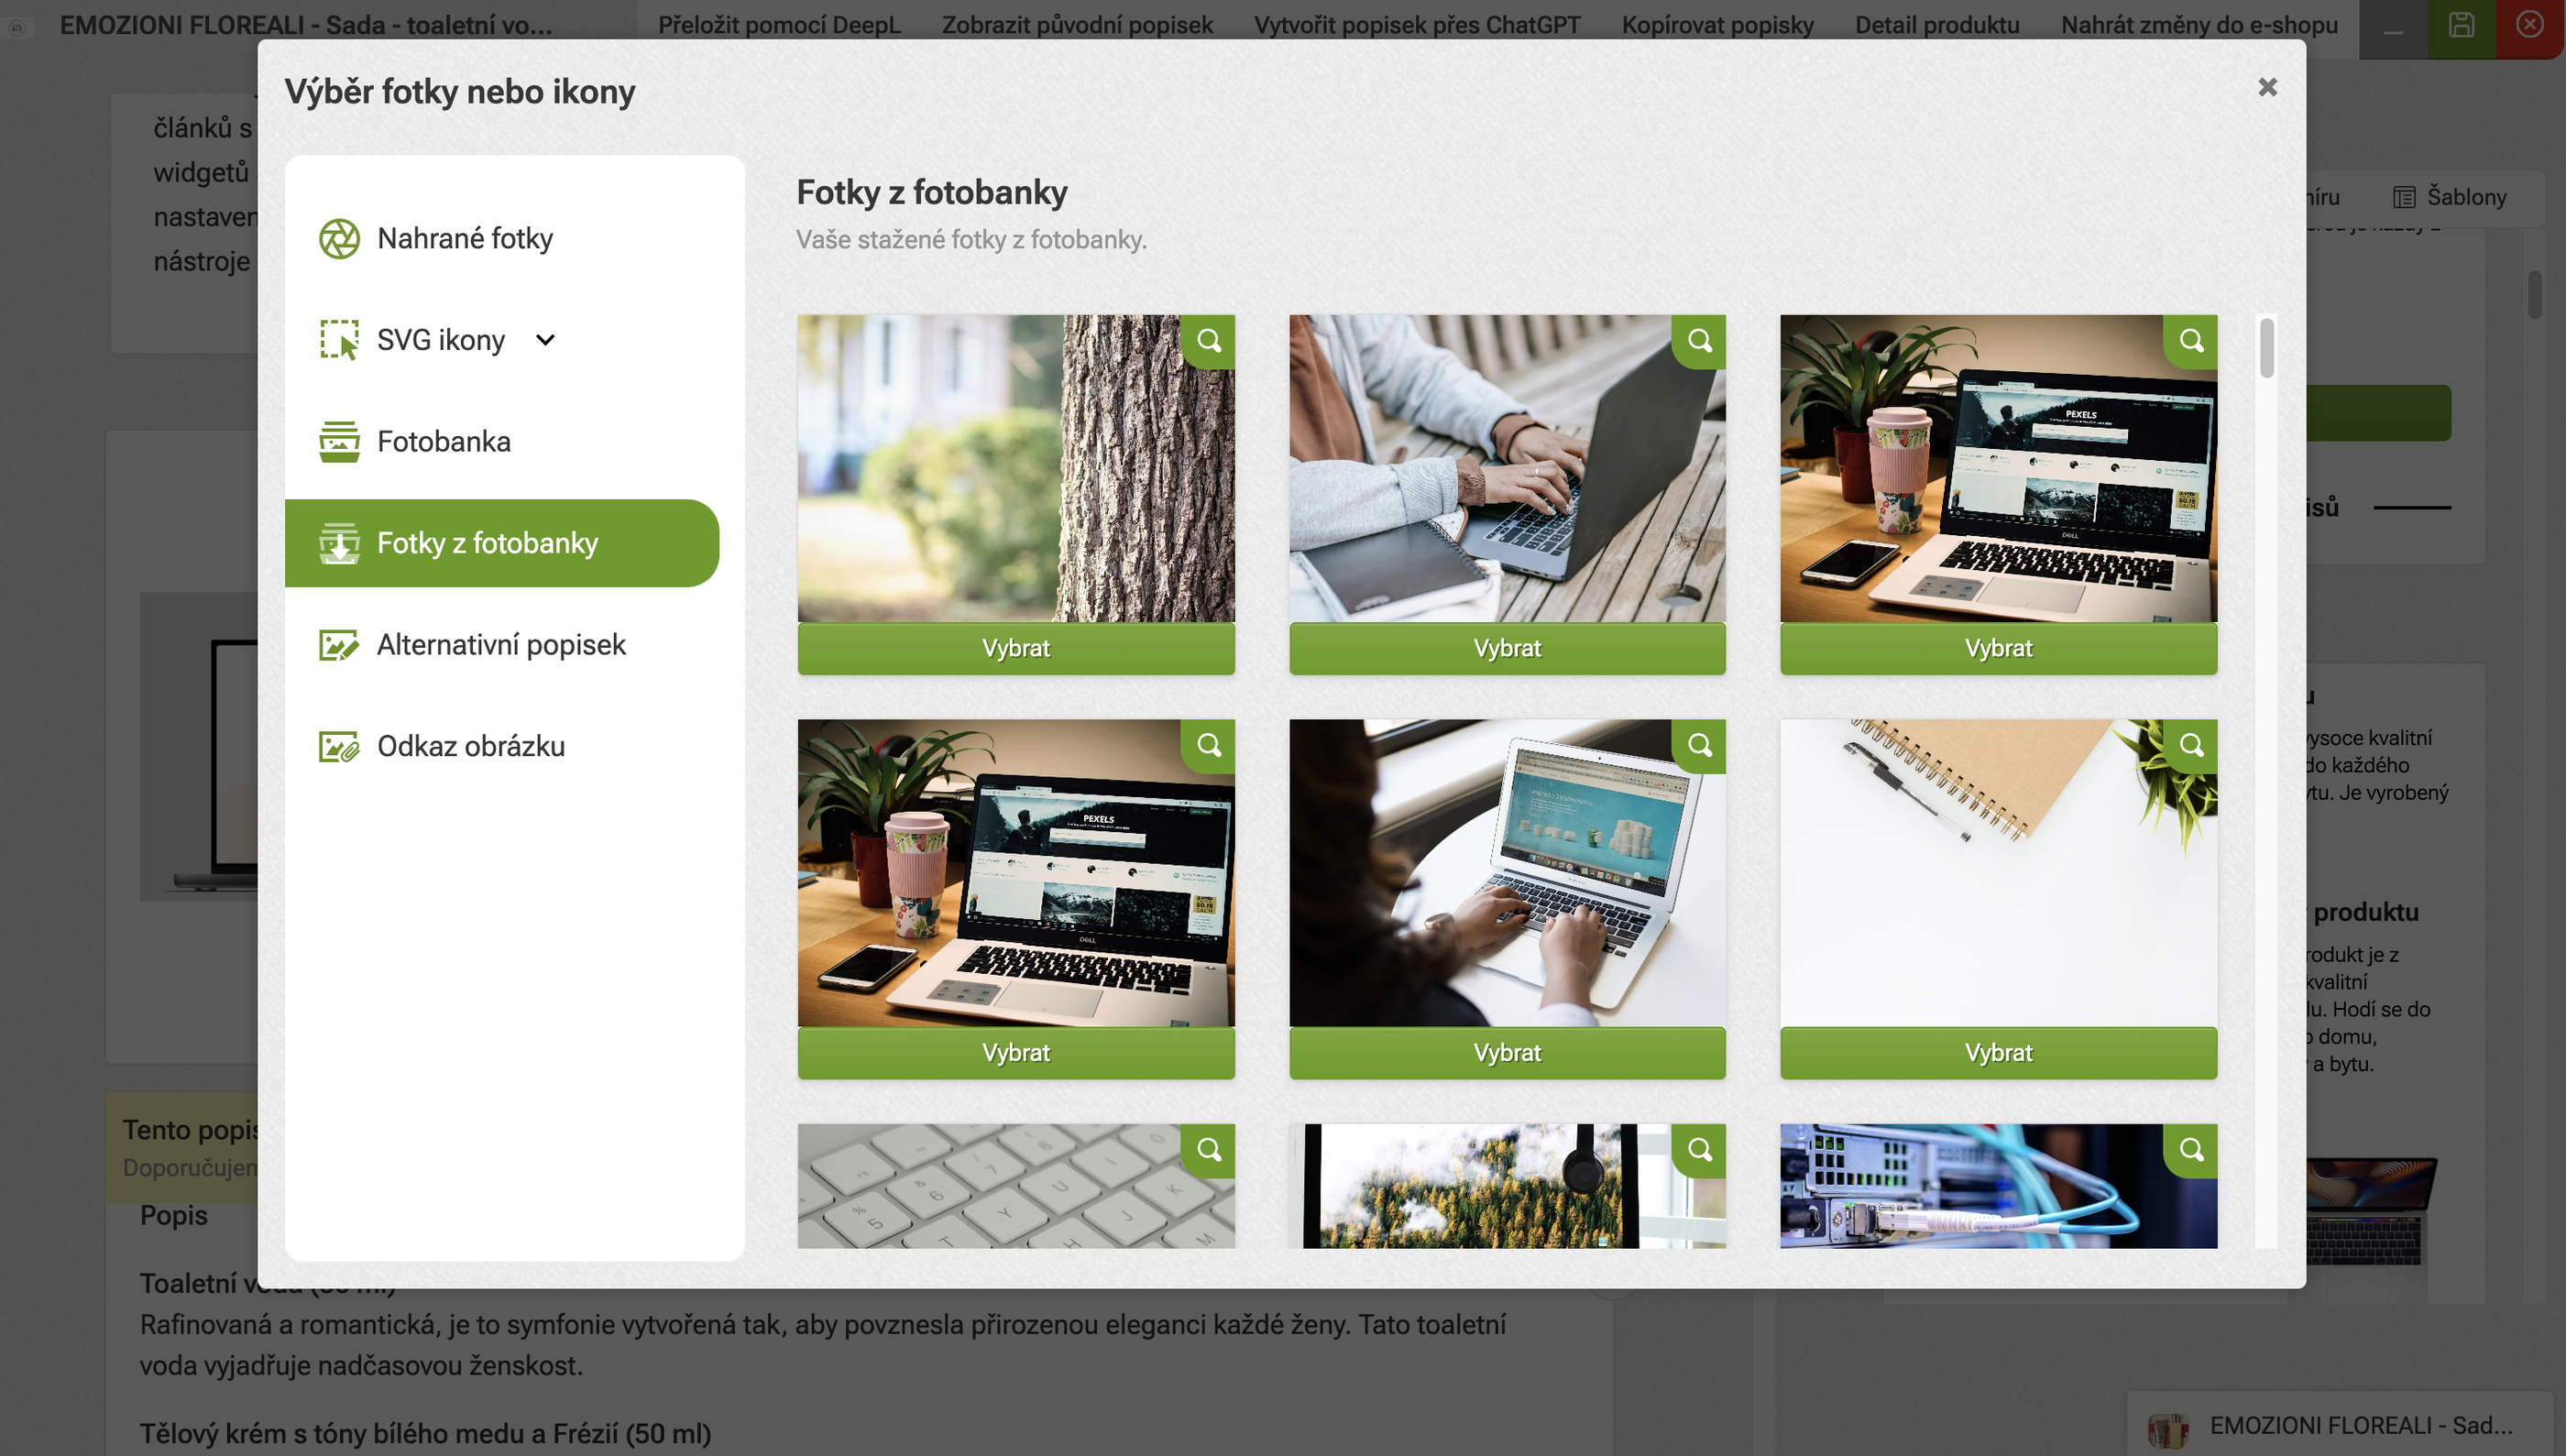 Stažené fotky z fotobanky
 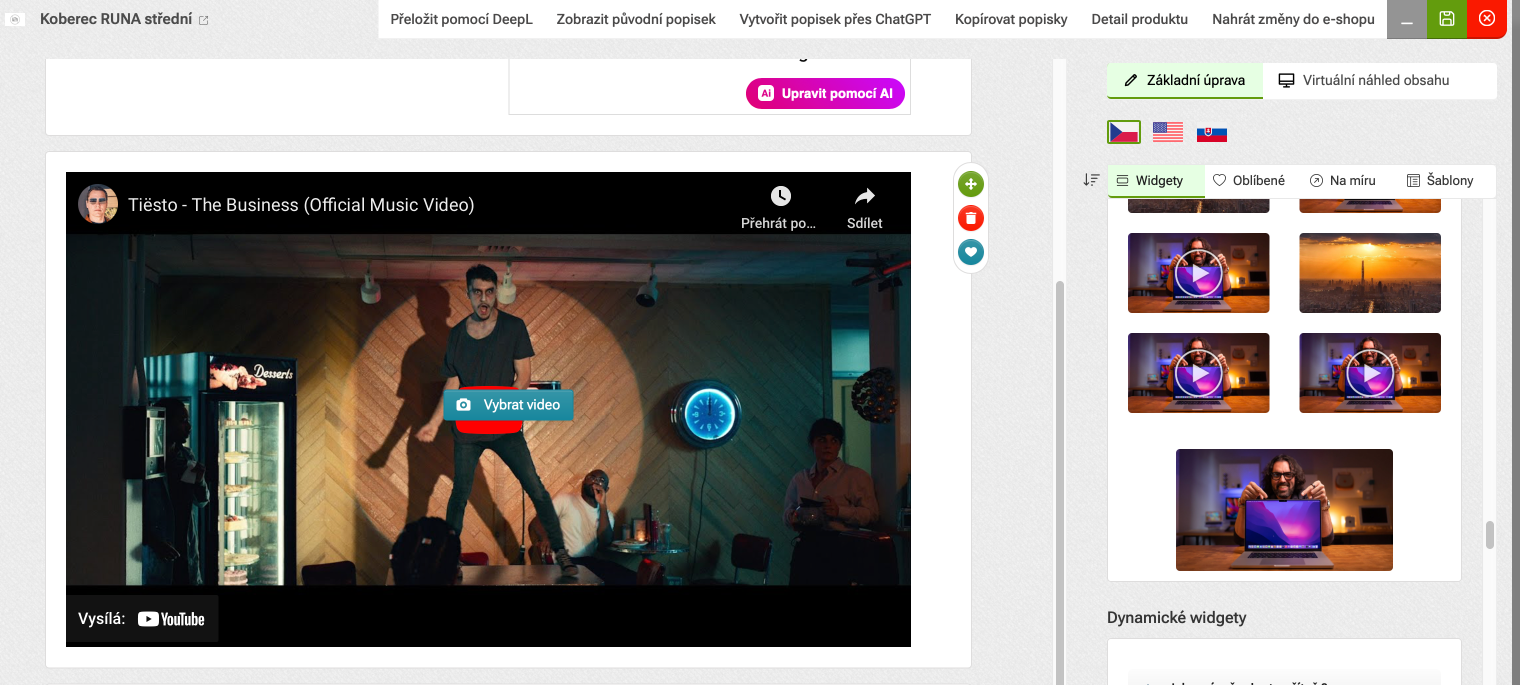 Přetáhneme widget s YouTube do obsahu
 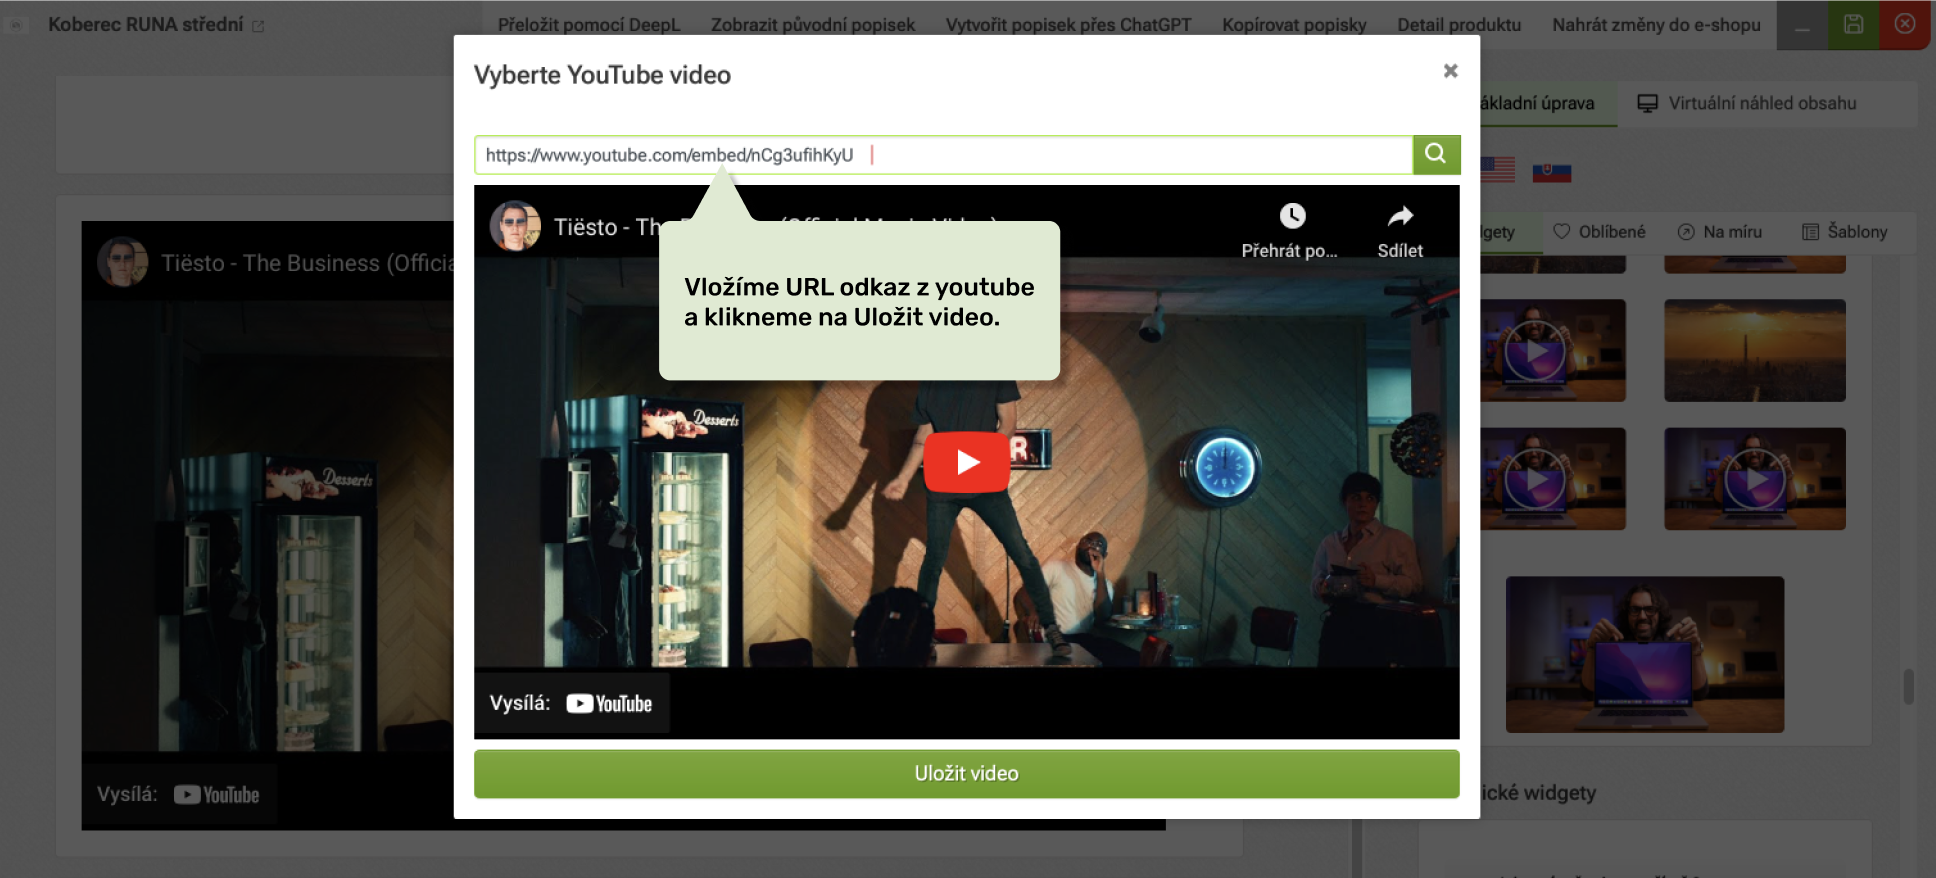 Vložíme odkaz z YouTube a uložíme
 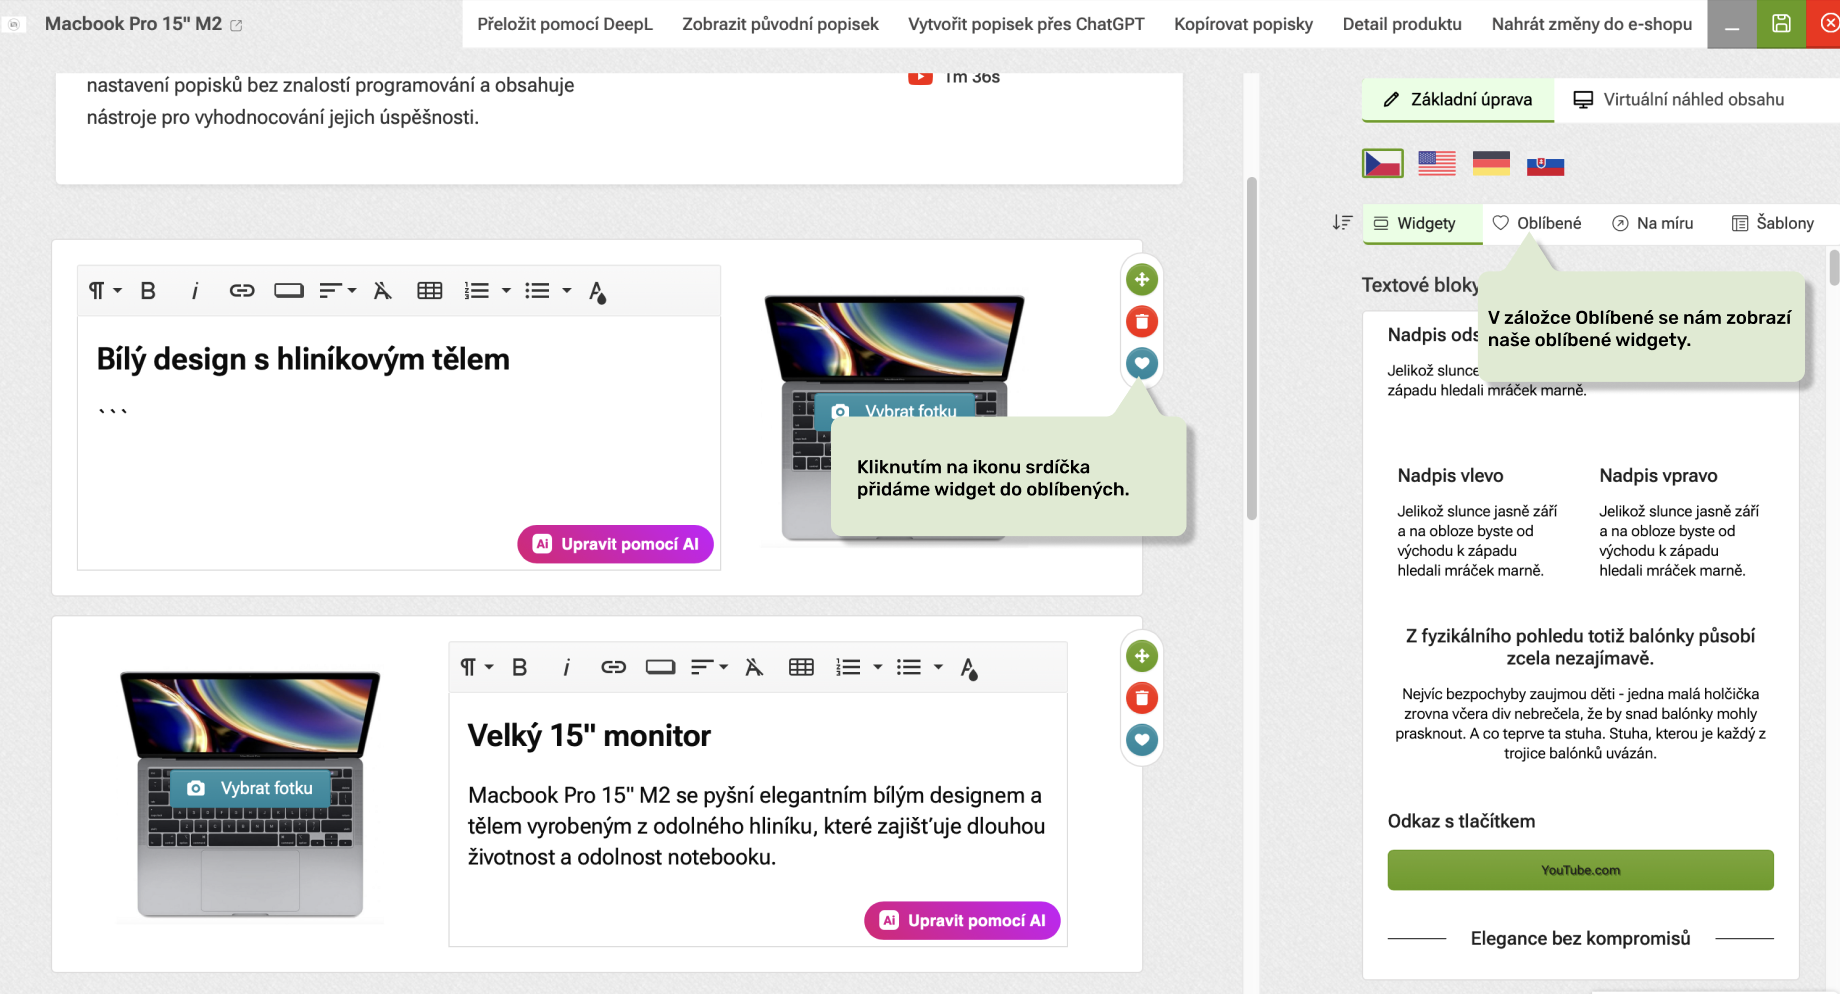 Přidávání widgetů do oblíbených
 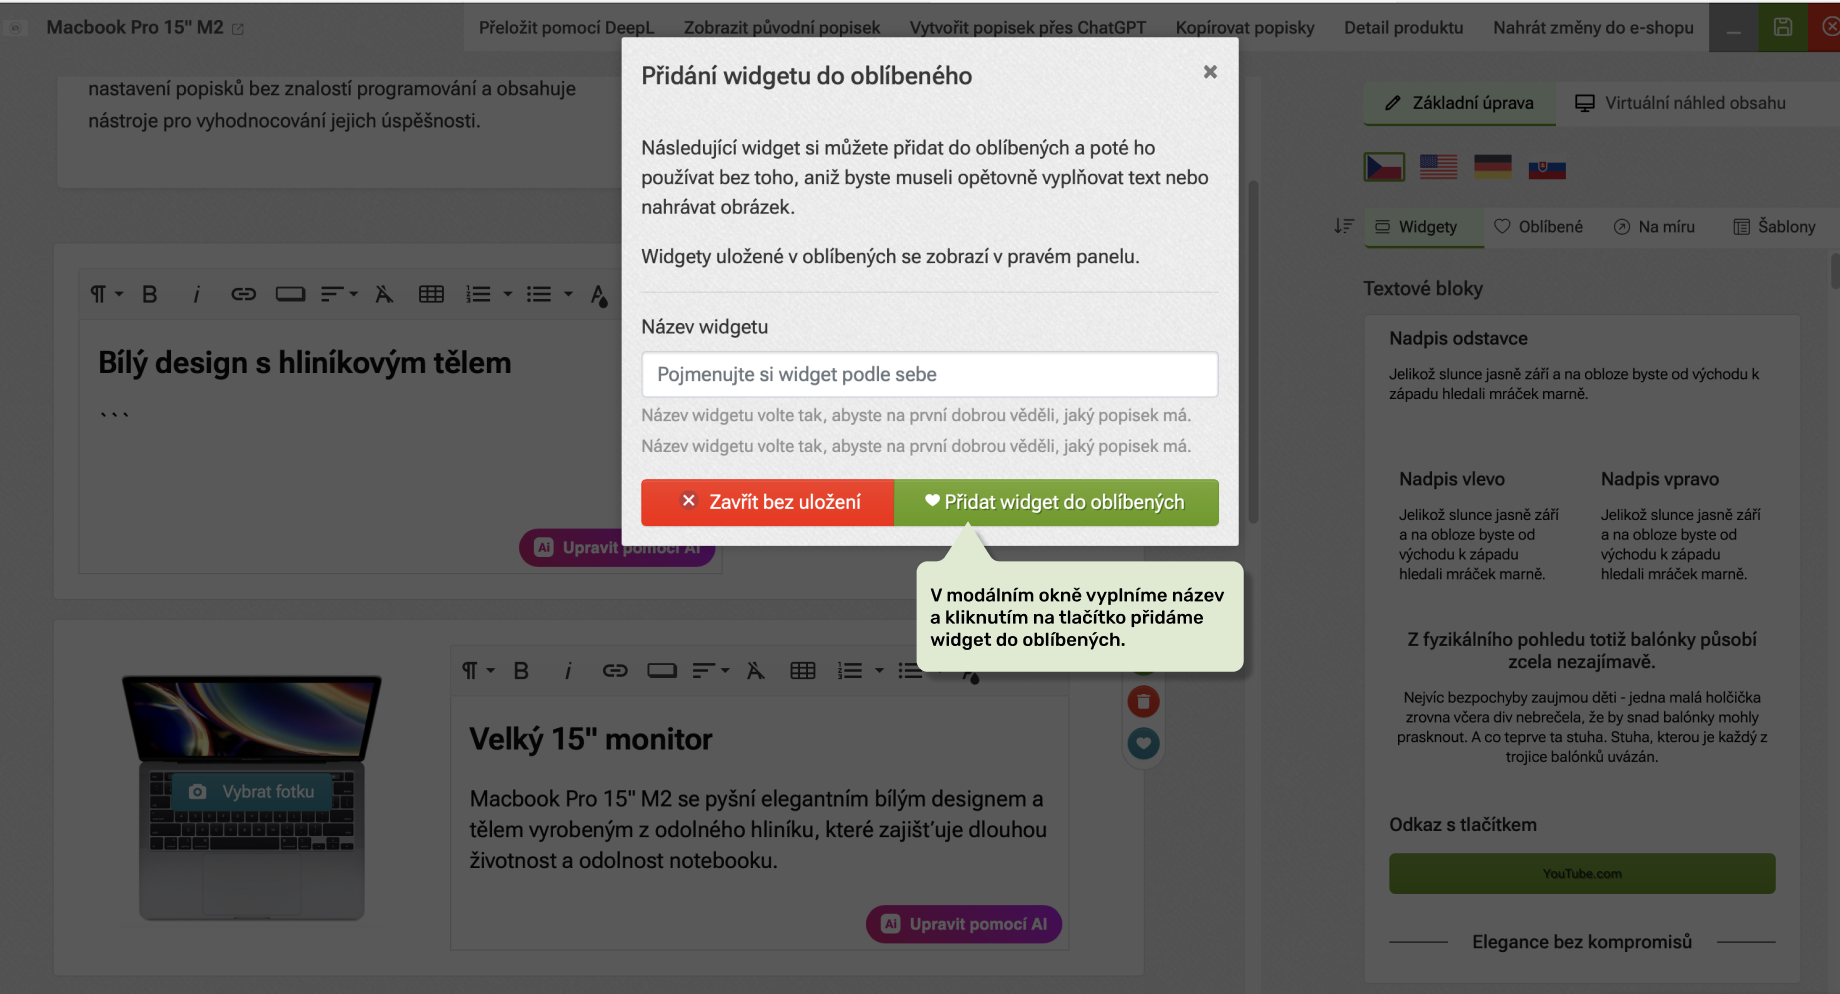 Uložení oblíbeného widgetu
 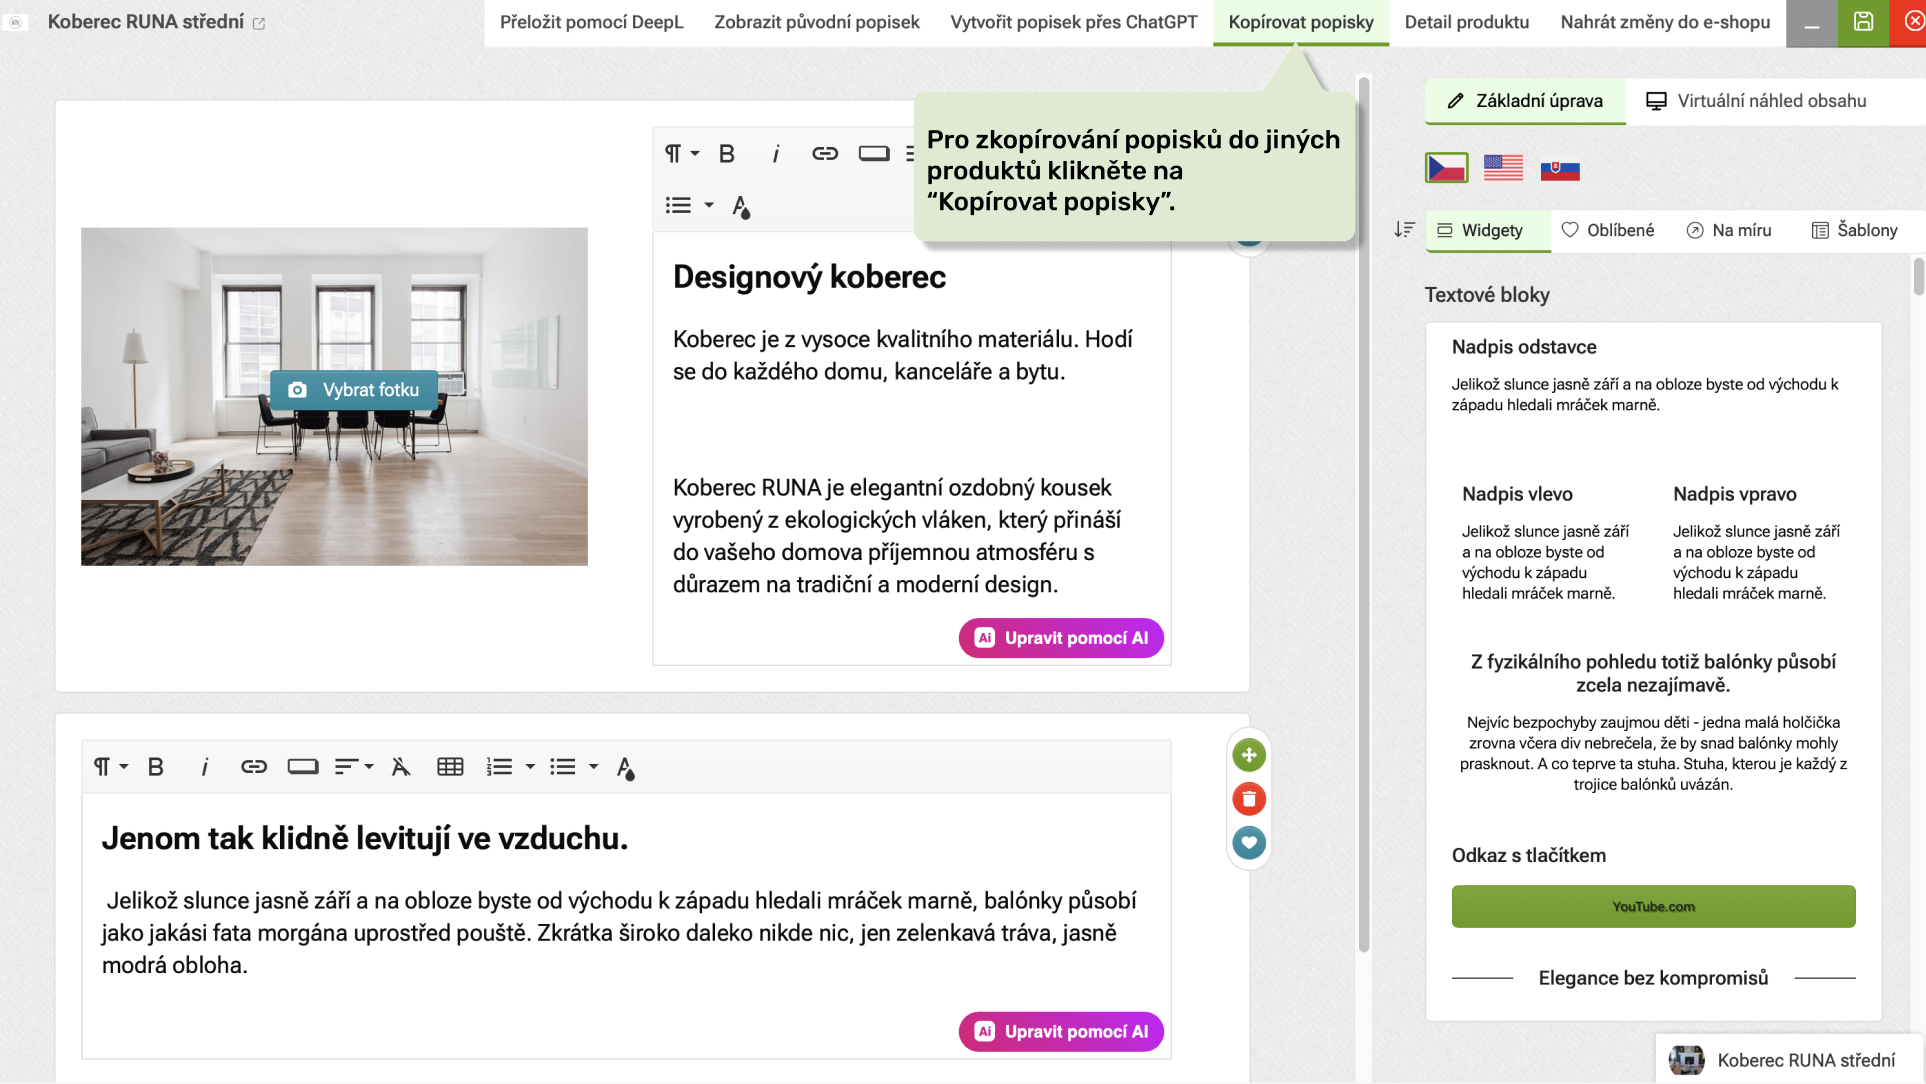 Pro kopírování klikneme v horním menu na odkaz
 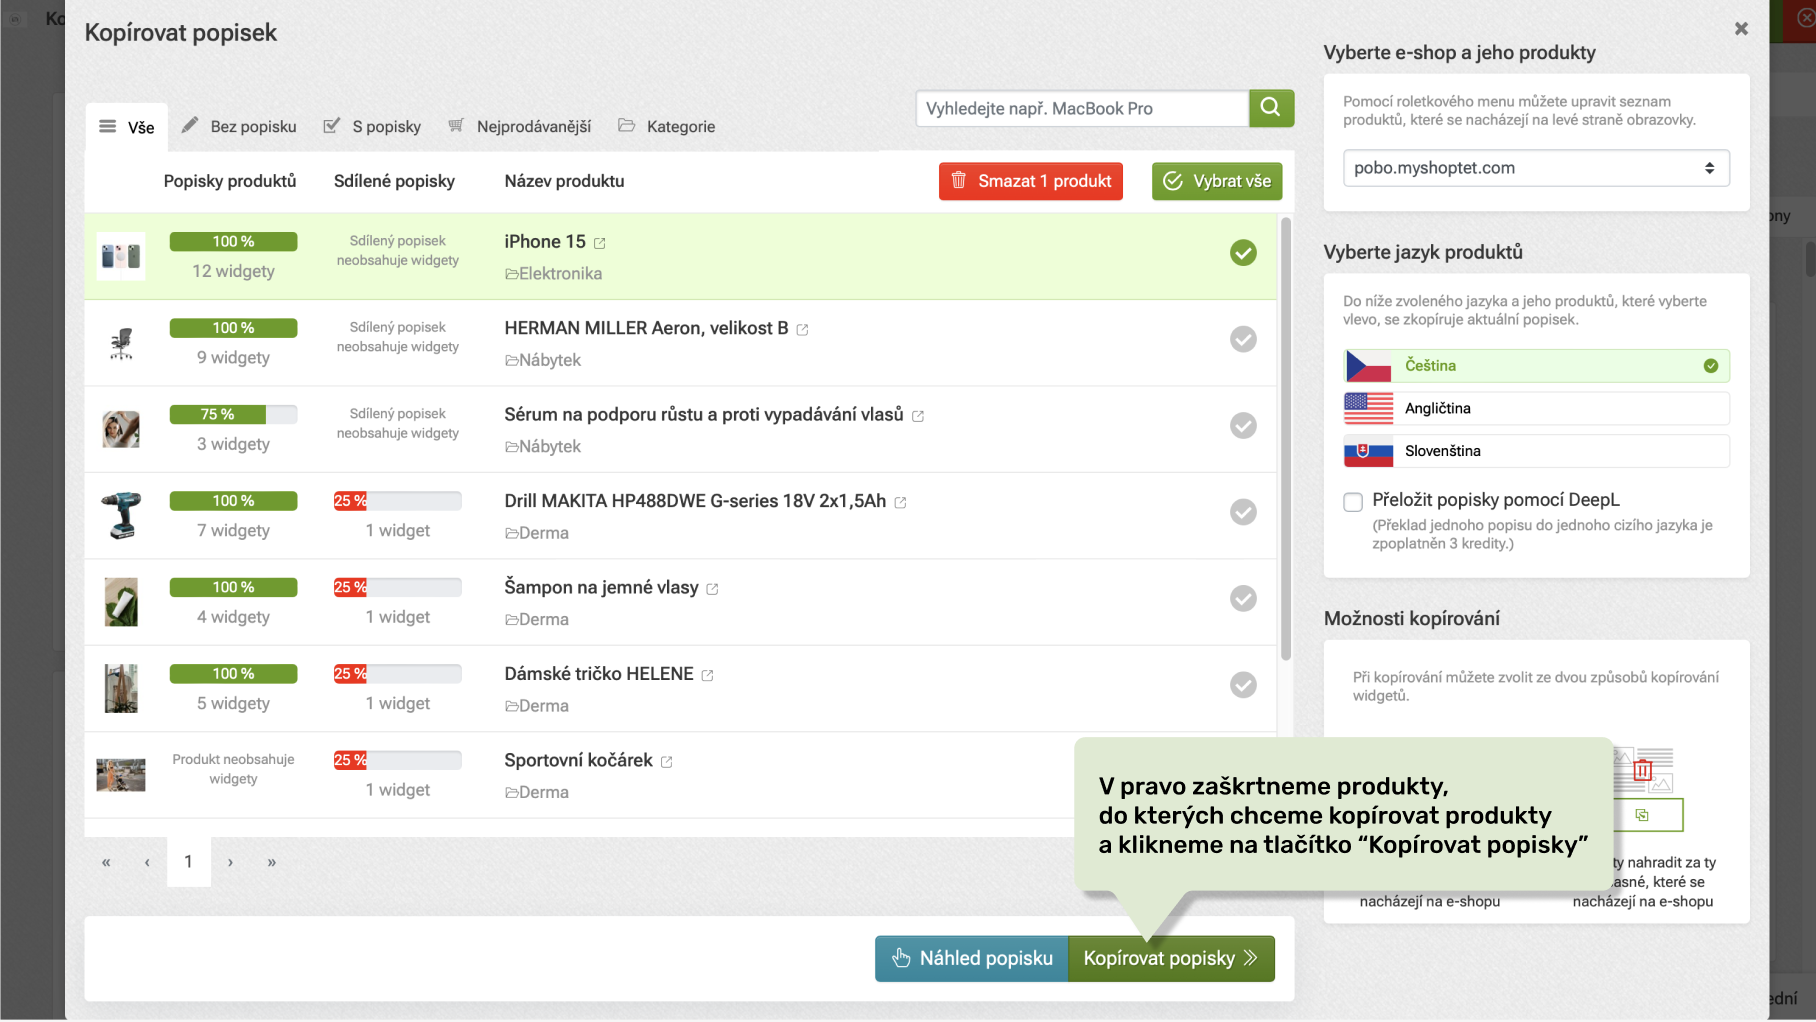 Vybereme produkty a potvrdíme
 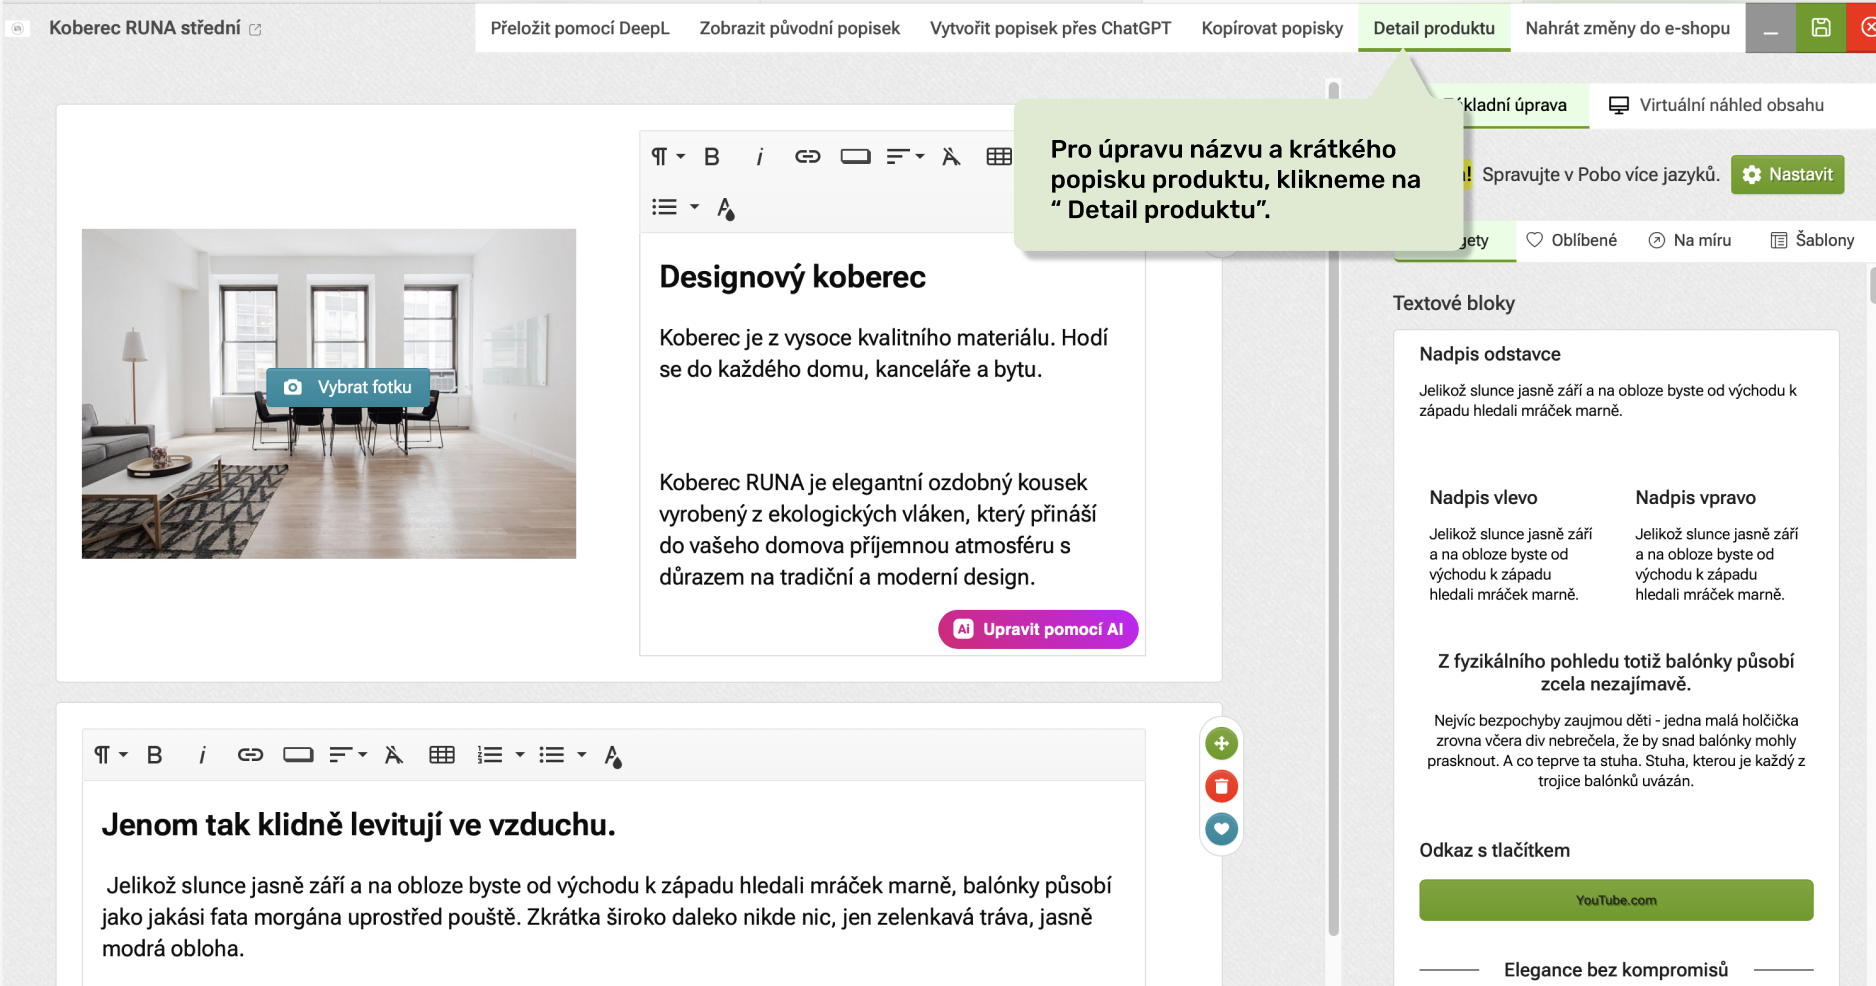 Pro úpravu názvu produktu a krátkého popisku klikneme na záložku v editoru
 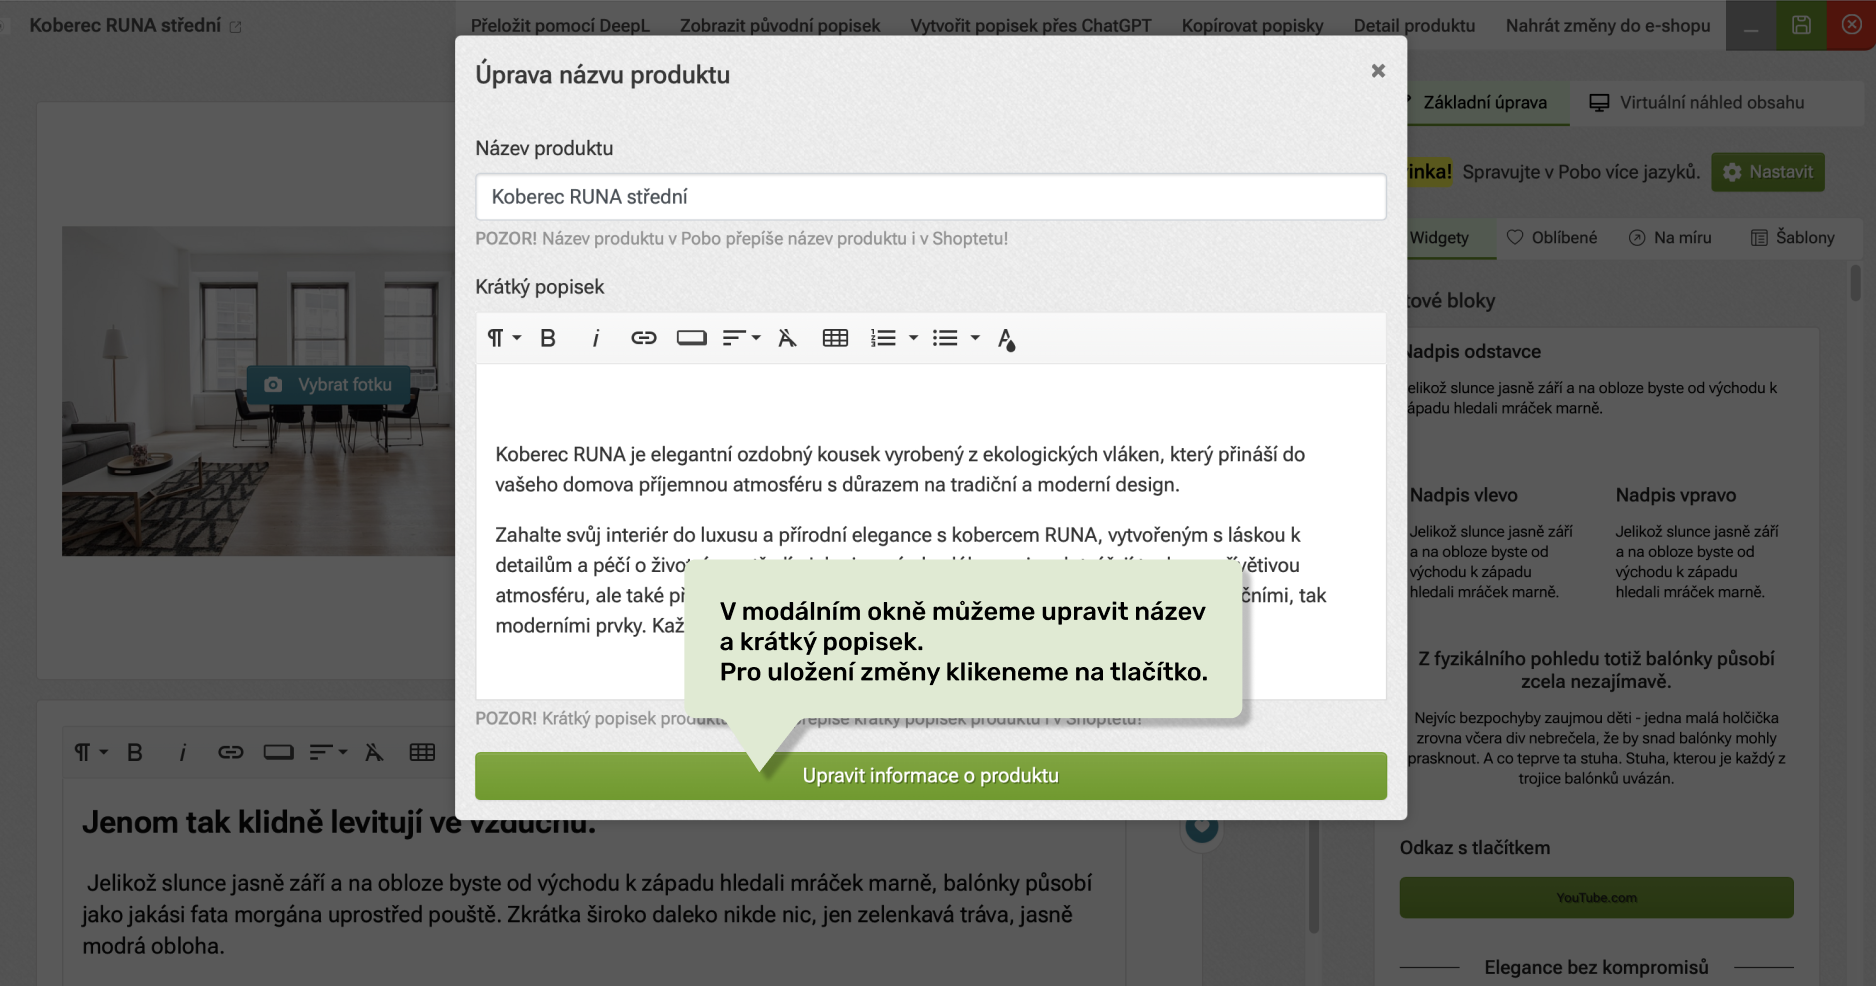 Upravíme informace a klikneme na zelené tlačítko pod formulářem
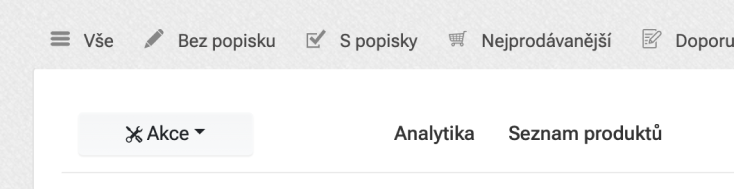

Potřebujete poradit?
Jmenuji se Petra a ráda vám s naším doplňkem pomohu.
Neváhejte mi napsat na e-mail: podpora@pobo.cz
Rychlá navigace
- Jak psát popisky pro produkty, kategorie a blog?
- Jak napsat první popisek?
- Jak přidat obsahové widgety?
- Jak smazat či přesunout widget?
- Jak pracovat s textem?
- Co dělat, když udělám chybu?
- Jak pracovat s obrázky a ikonami?
- Jak upravit obrázek?
- Jak využít fotobanku?
- Jak přidat alternativní text k obrázku?
- Jak vložit odkaz do obrázku?
- Jak přidat YouTube videoklip?
- Jak fungují oblíbené widgety?
- Jak kopírovat popisky a widgety?
- Jak změnit v Pobo název a krátký popisek produktu?
- Jak fungují oblíbené produkty a kategorie?
- Jak vytvořit článek na blog nebo jinou stránku?

Přemýšlíte nad Pobo? Nechte si ho ukázat.
Zarezervujte si krátký 30 minutový hovor, ve kterém vám ukážeme, jak Pobo funguje, na co se hodí a jak vám může ušetřit spoustu času i peněz.
Rezervovat hovor